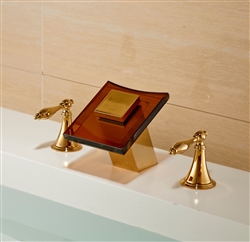
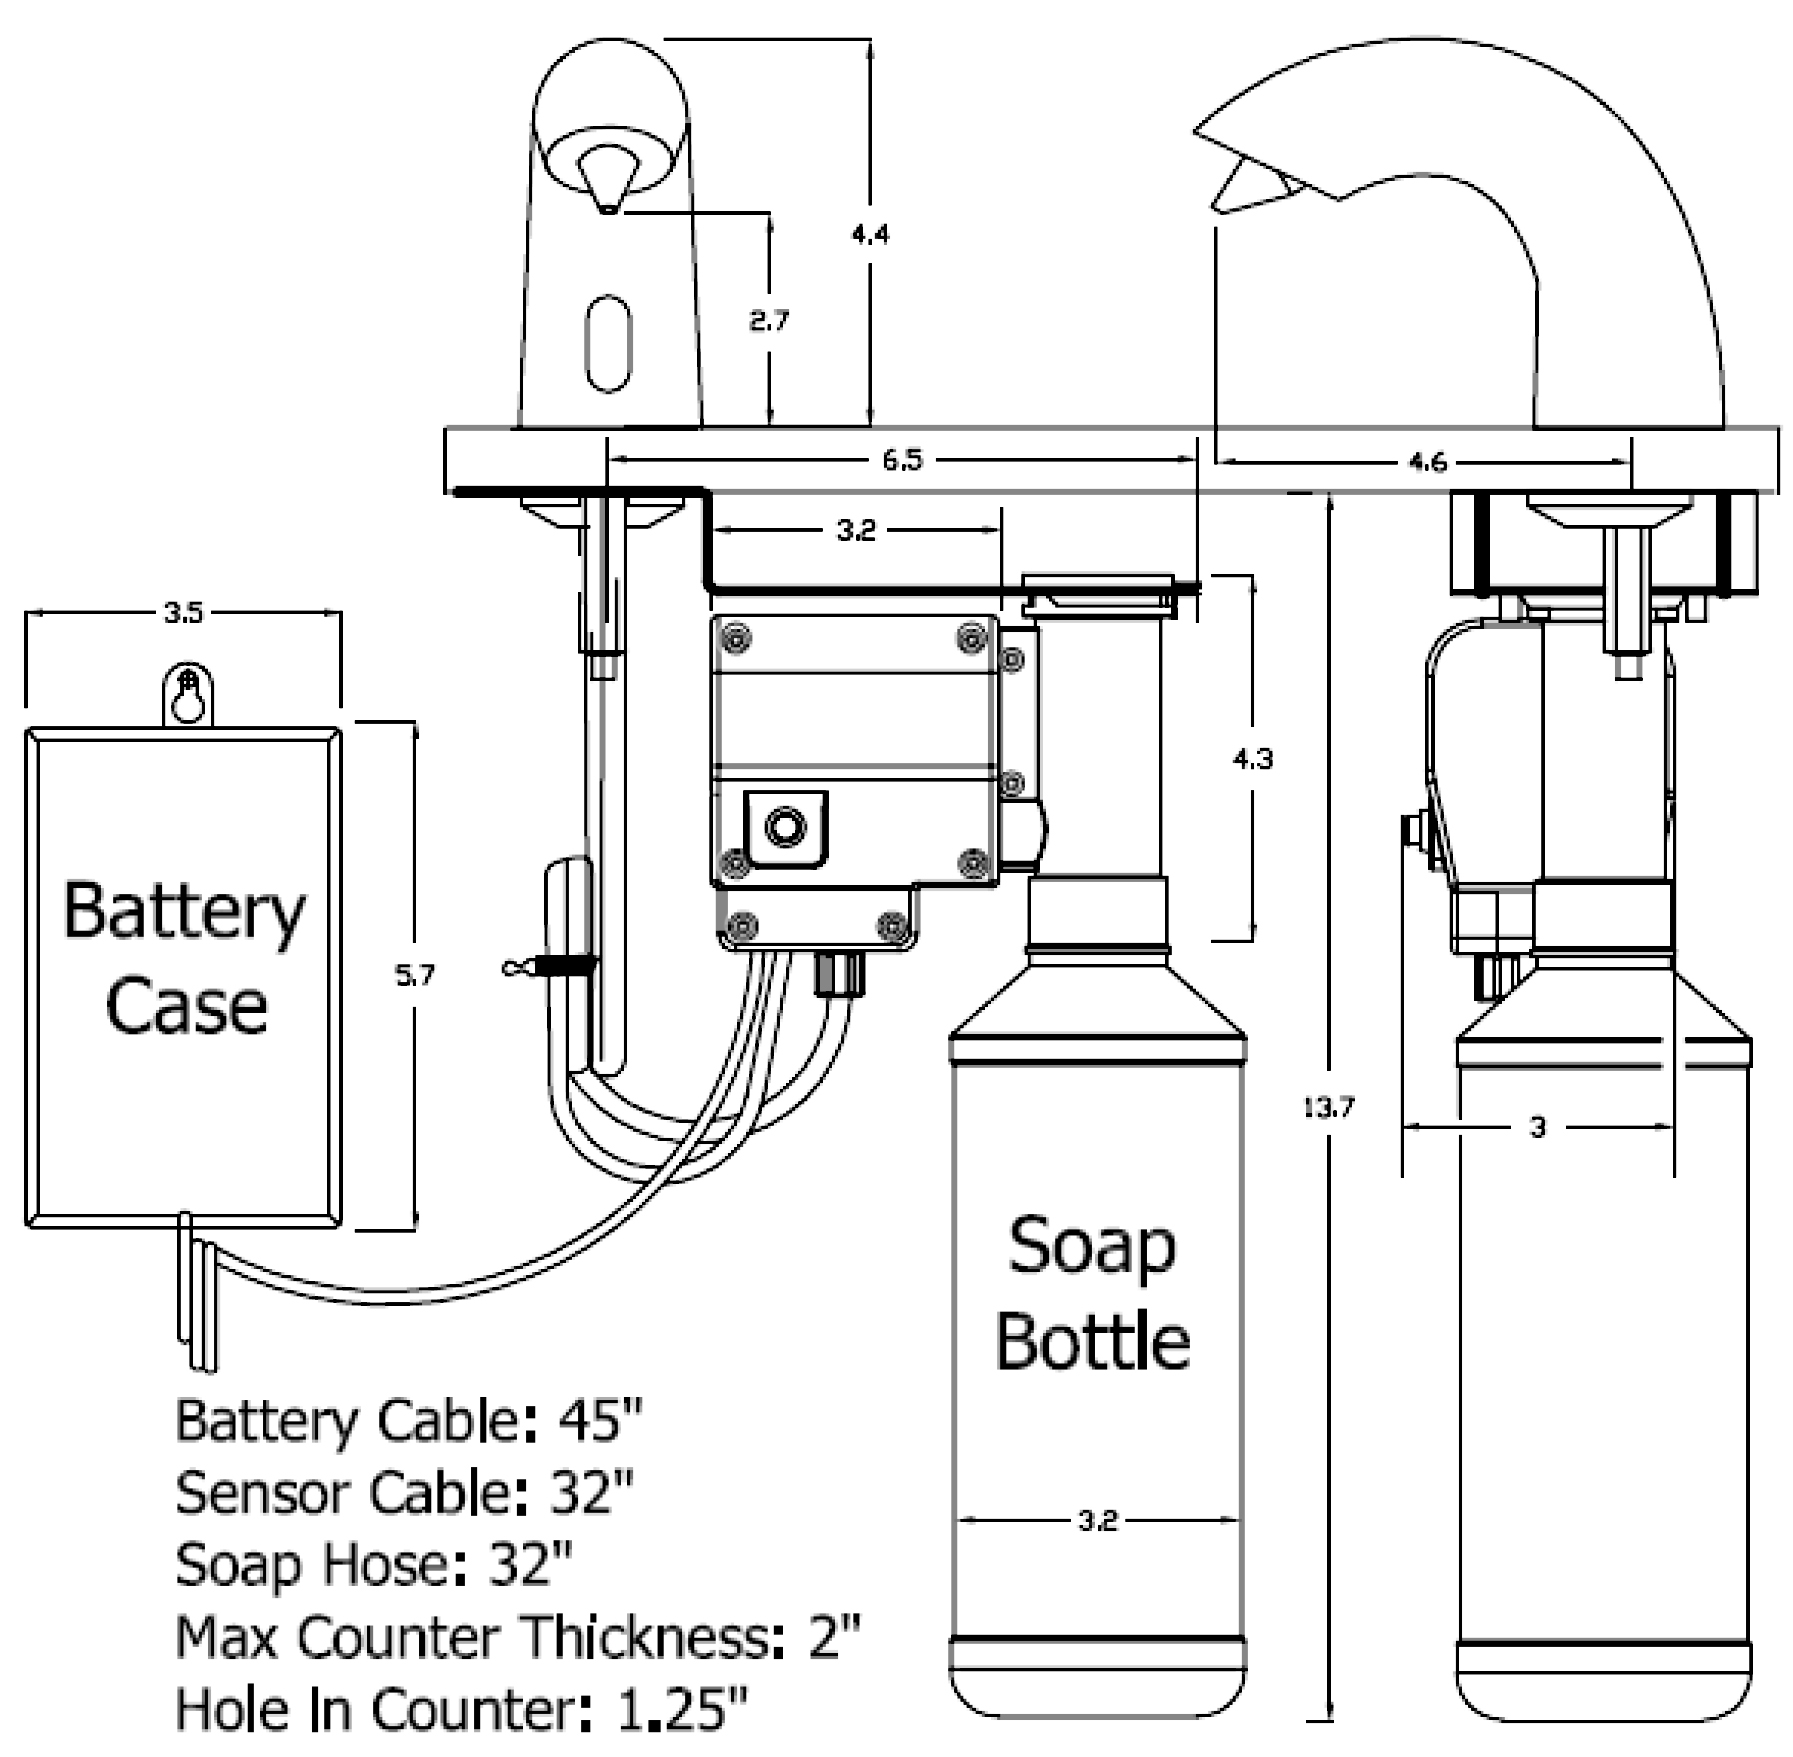
Fontana Reno Deck Mount Hands Free Commercial Automatic Soap Dispenser
When it comes to commercial restroom hygine, FontanaShowers is offering shape, finishes, and styles that you've looking for. Give your bathroom an elegant glance with sink upgrades. This is one of the trendiest finishes across decor styles in the bathroom. The dispenser is very ideal for hygienic hand washing. This has an elegant design hygienic and elevates the appeal of any decor made from the highest quality and for great tastes. Ideal for commercial use applications in public restrooms, restaurants, office building, public facilities, hospitals. Fits all US Standard plumbing. It comes super seal technology inside, capable of delivering superior performance with solid construction for long durability that will upgrade your bathroom with a modern and cool look for a long period of time. Ideal for commercial use applications in public restrooms, restaurants, office building, public facilities, hospitals. Fits all US Standard plumbing. Fontana Reno Deck Mount Hands Free Commercial Automatic Soap Dispenser Features:| Brand Name: FontanaShowersModel Number: FS9819Feature: Foam Soap DispenserDispenser Type: Automatic DispenserMain Material: Brass With ChromingType: Deck-Mount Soap DispenserWorking power: DC6VSensor distance: 2.4-3.9 inches (6-10cm)Soap Capacity: 1500MLSensor lifetime: 300,000 times on/offPump lifetime: 80,000 times on/offUsage: Residential / Commercial | .png)
|
FontanaShowers® Product Warranty Information 
|
|
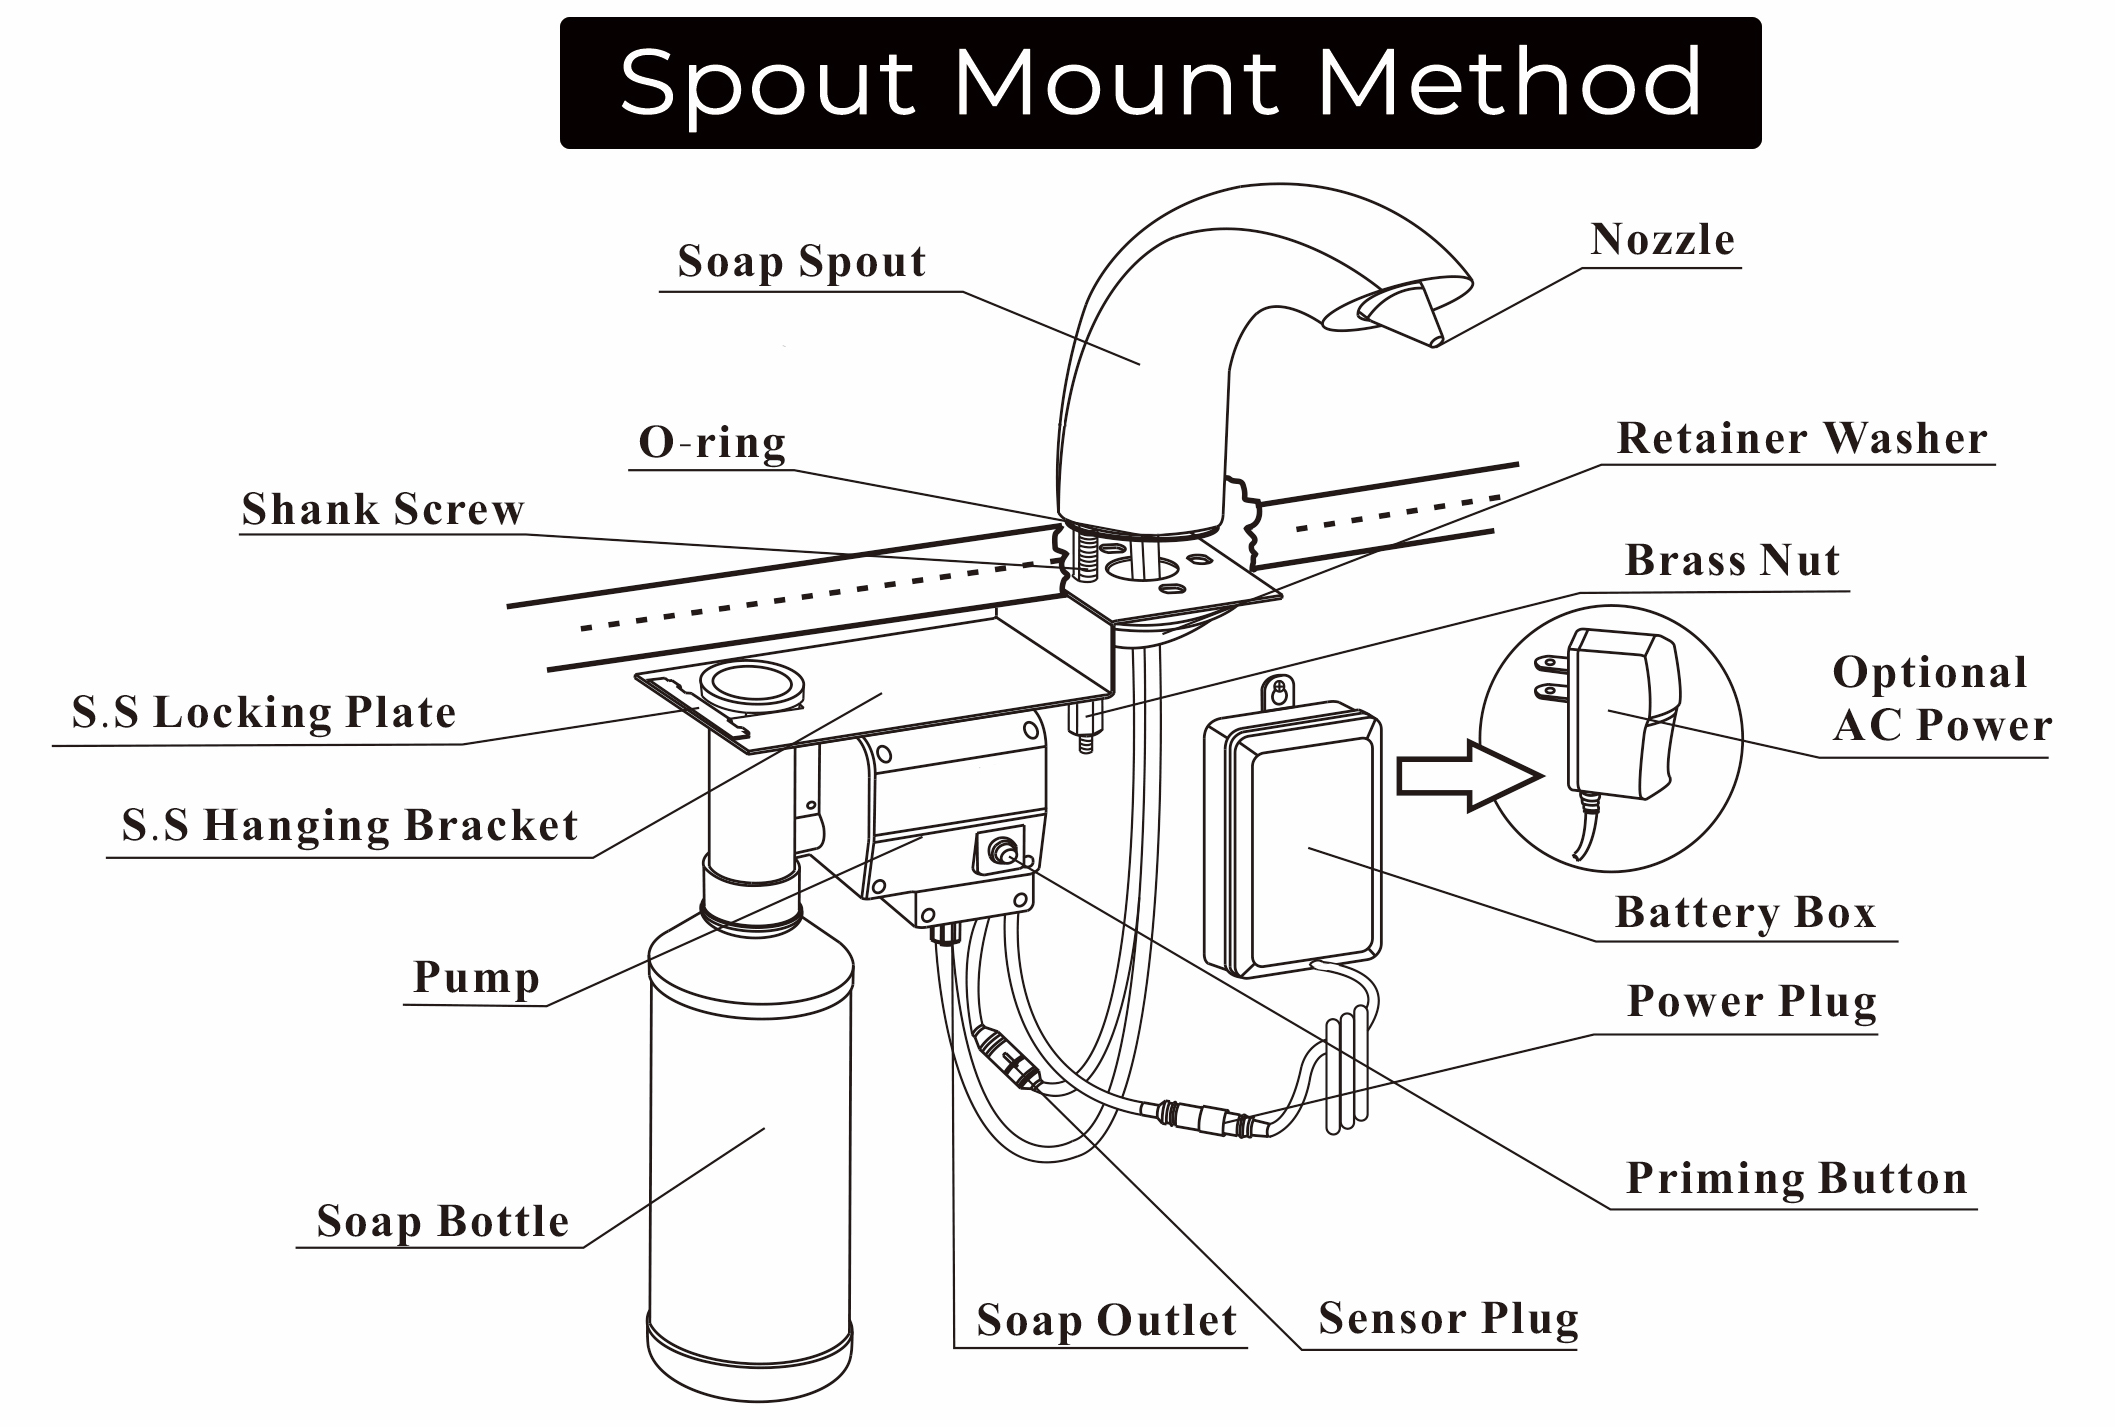
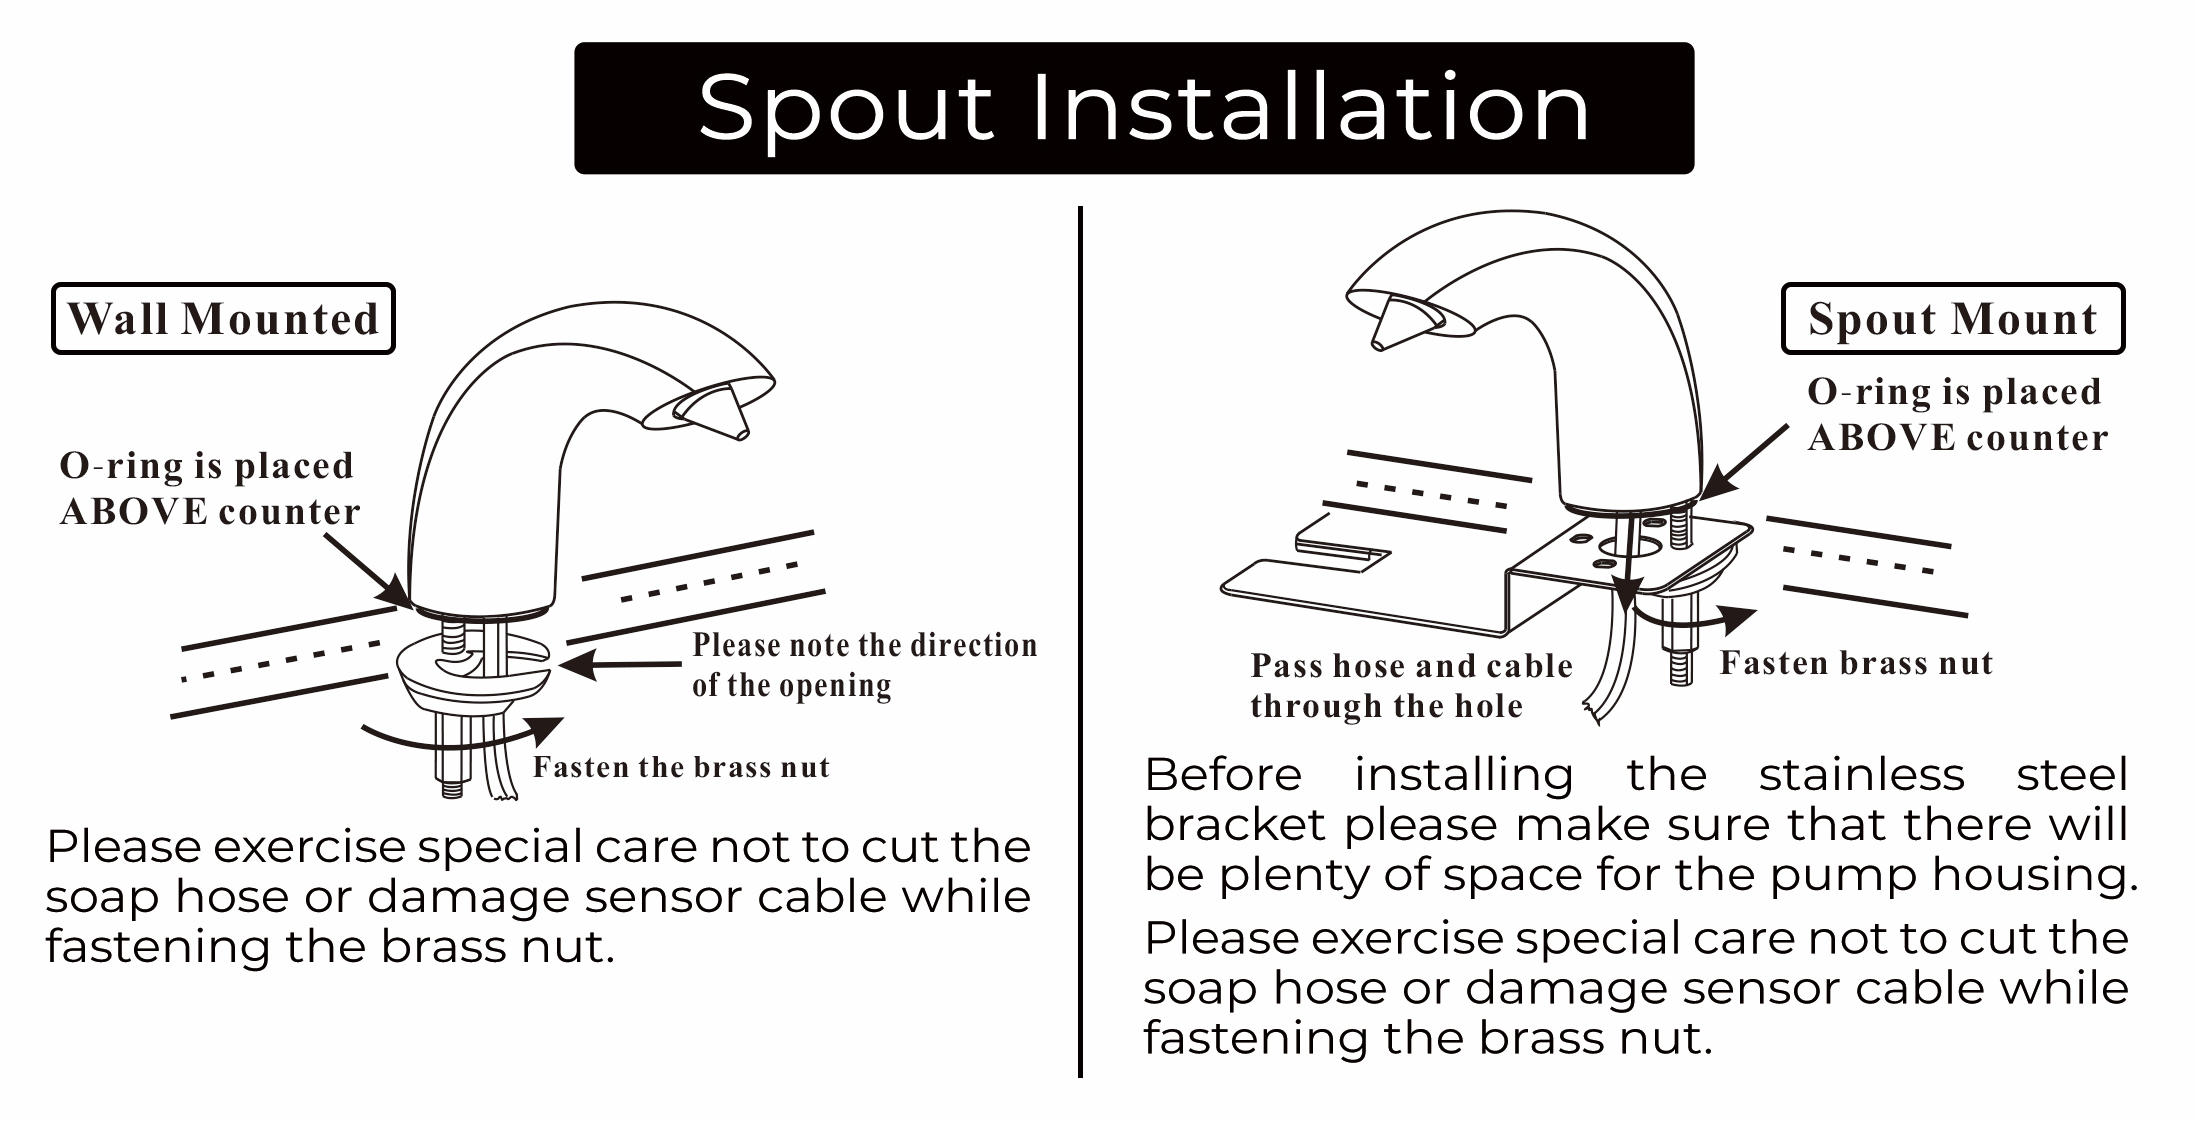
Spout Installation
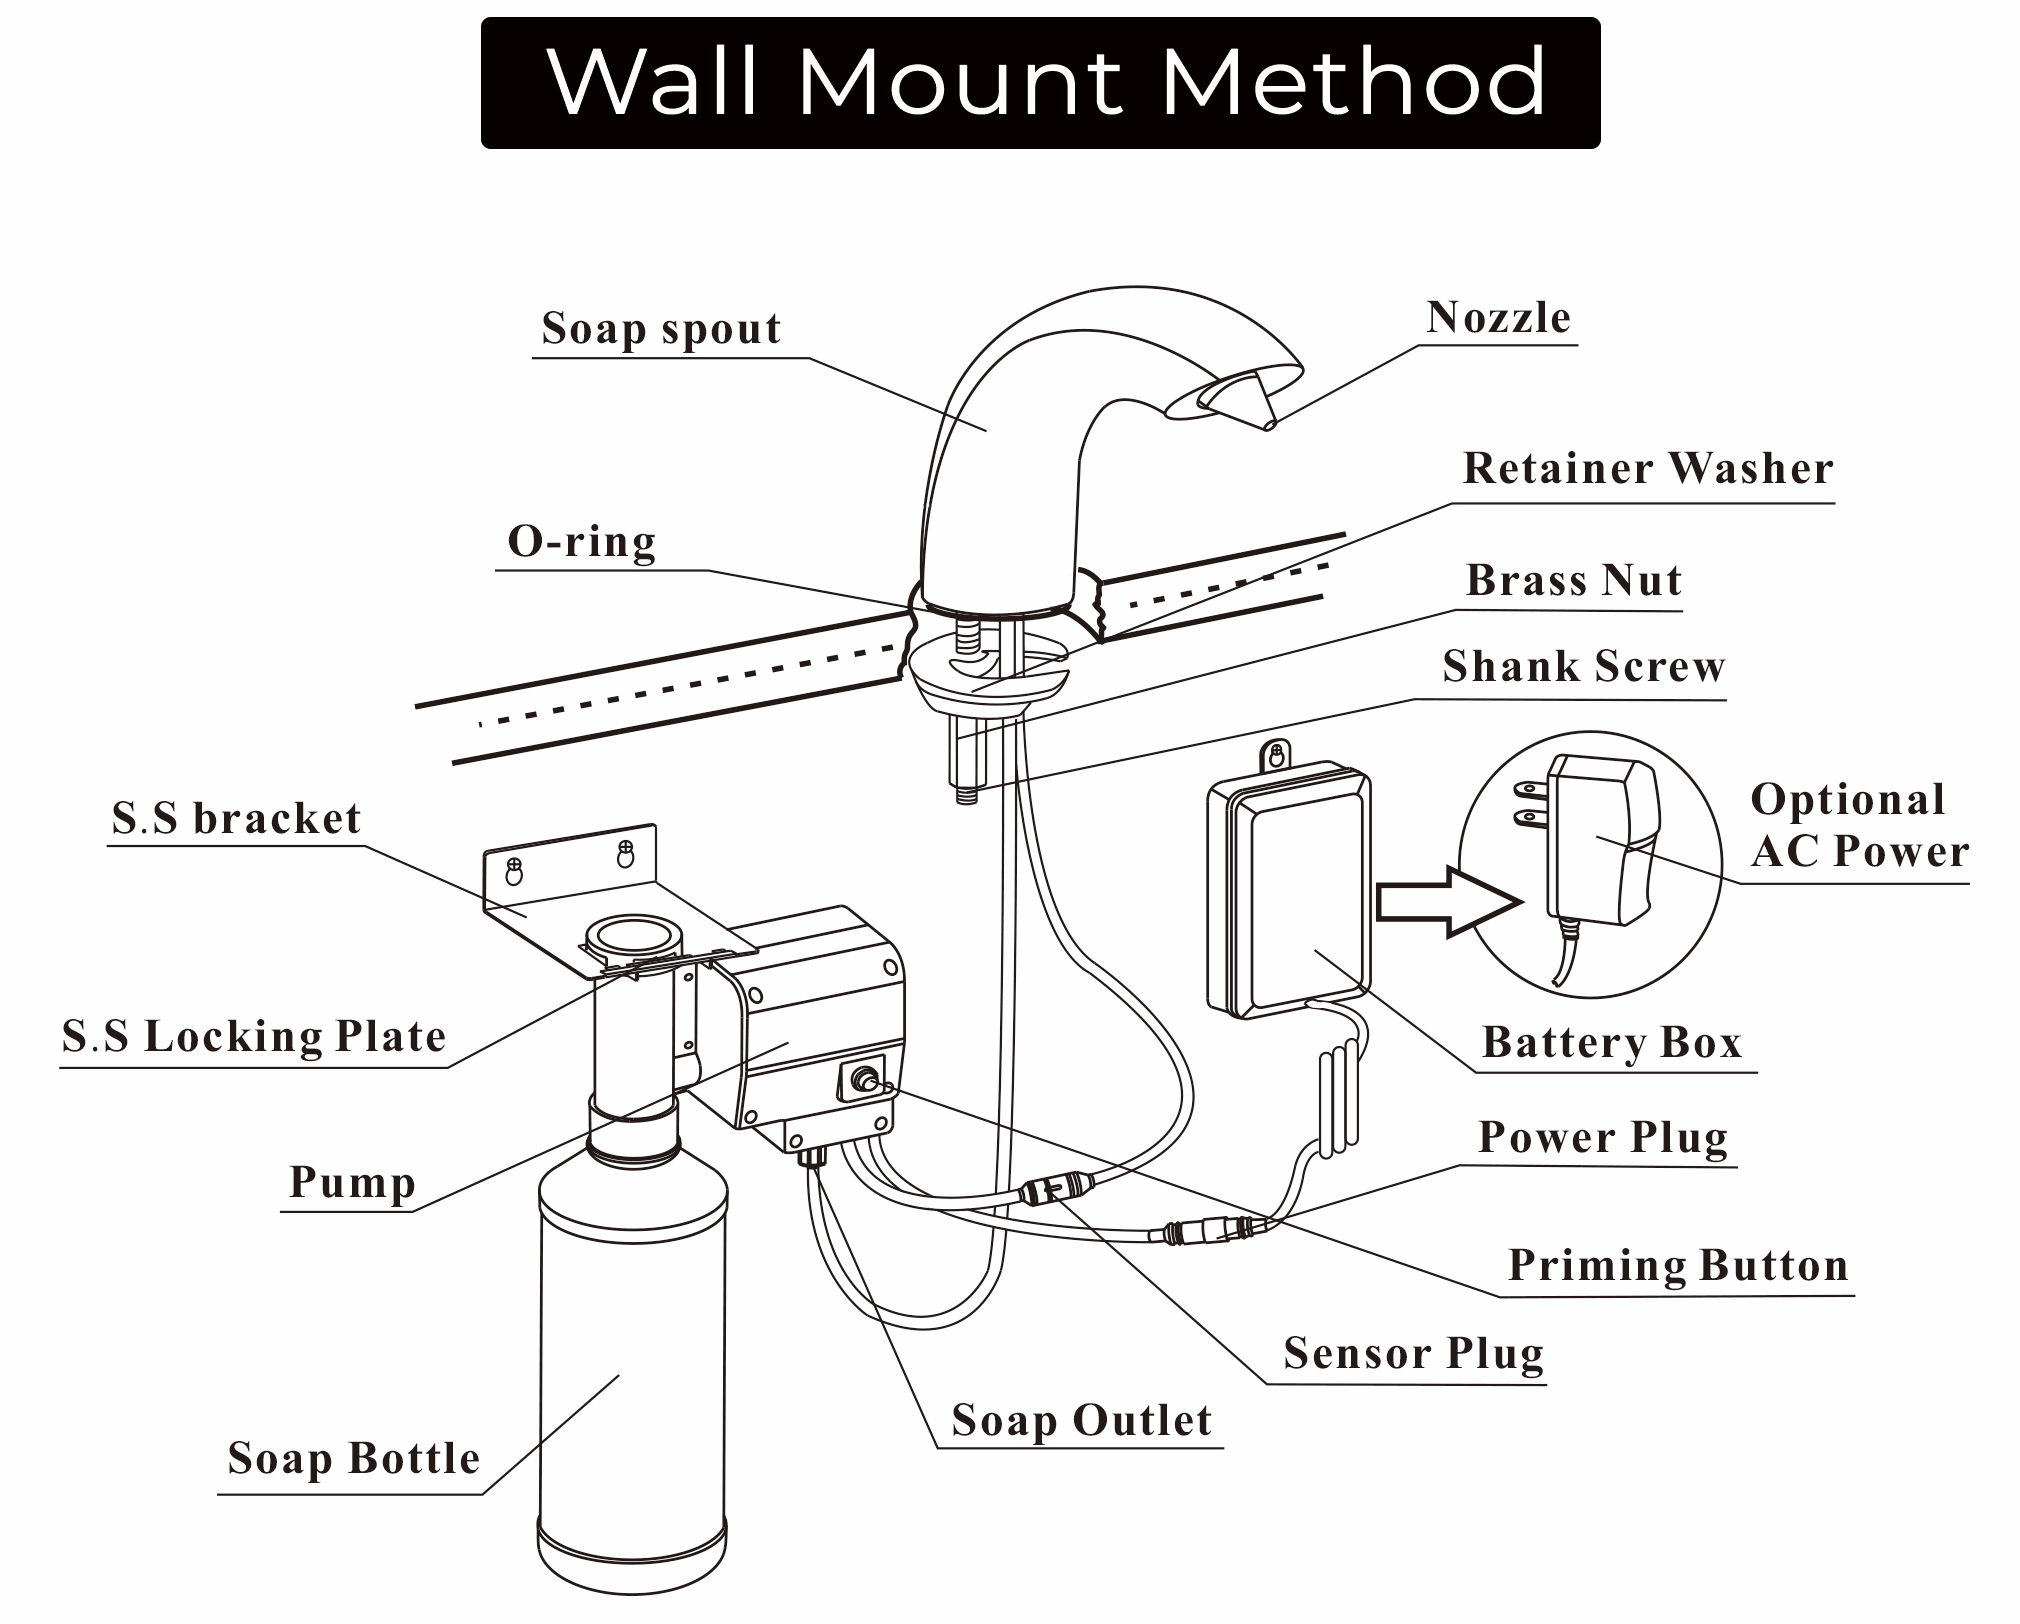
Wall Mounted
Please exercise special care not to cut the soap hose or damage sensor cable while fastening the brass nut.
Spout Mount
Before installing the stainless steel bracket please make sure that there will be plenty of space for the pump housing. Please exercise special care not to cut the soap hose or damage sensor cable while fastening the brass nut.
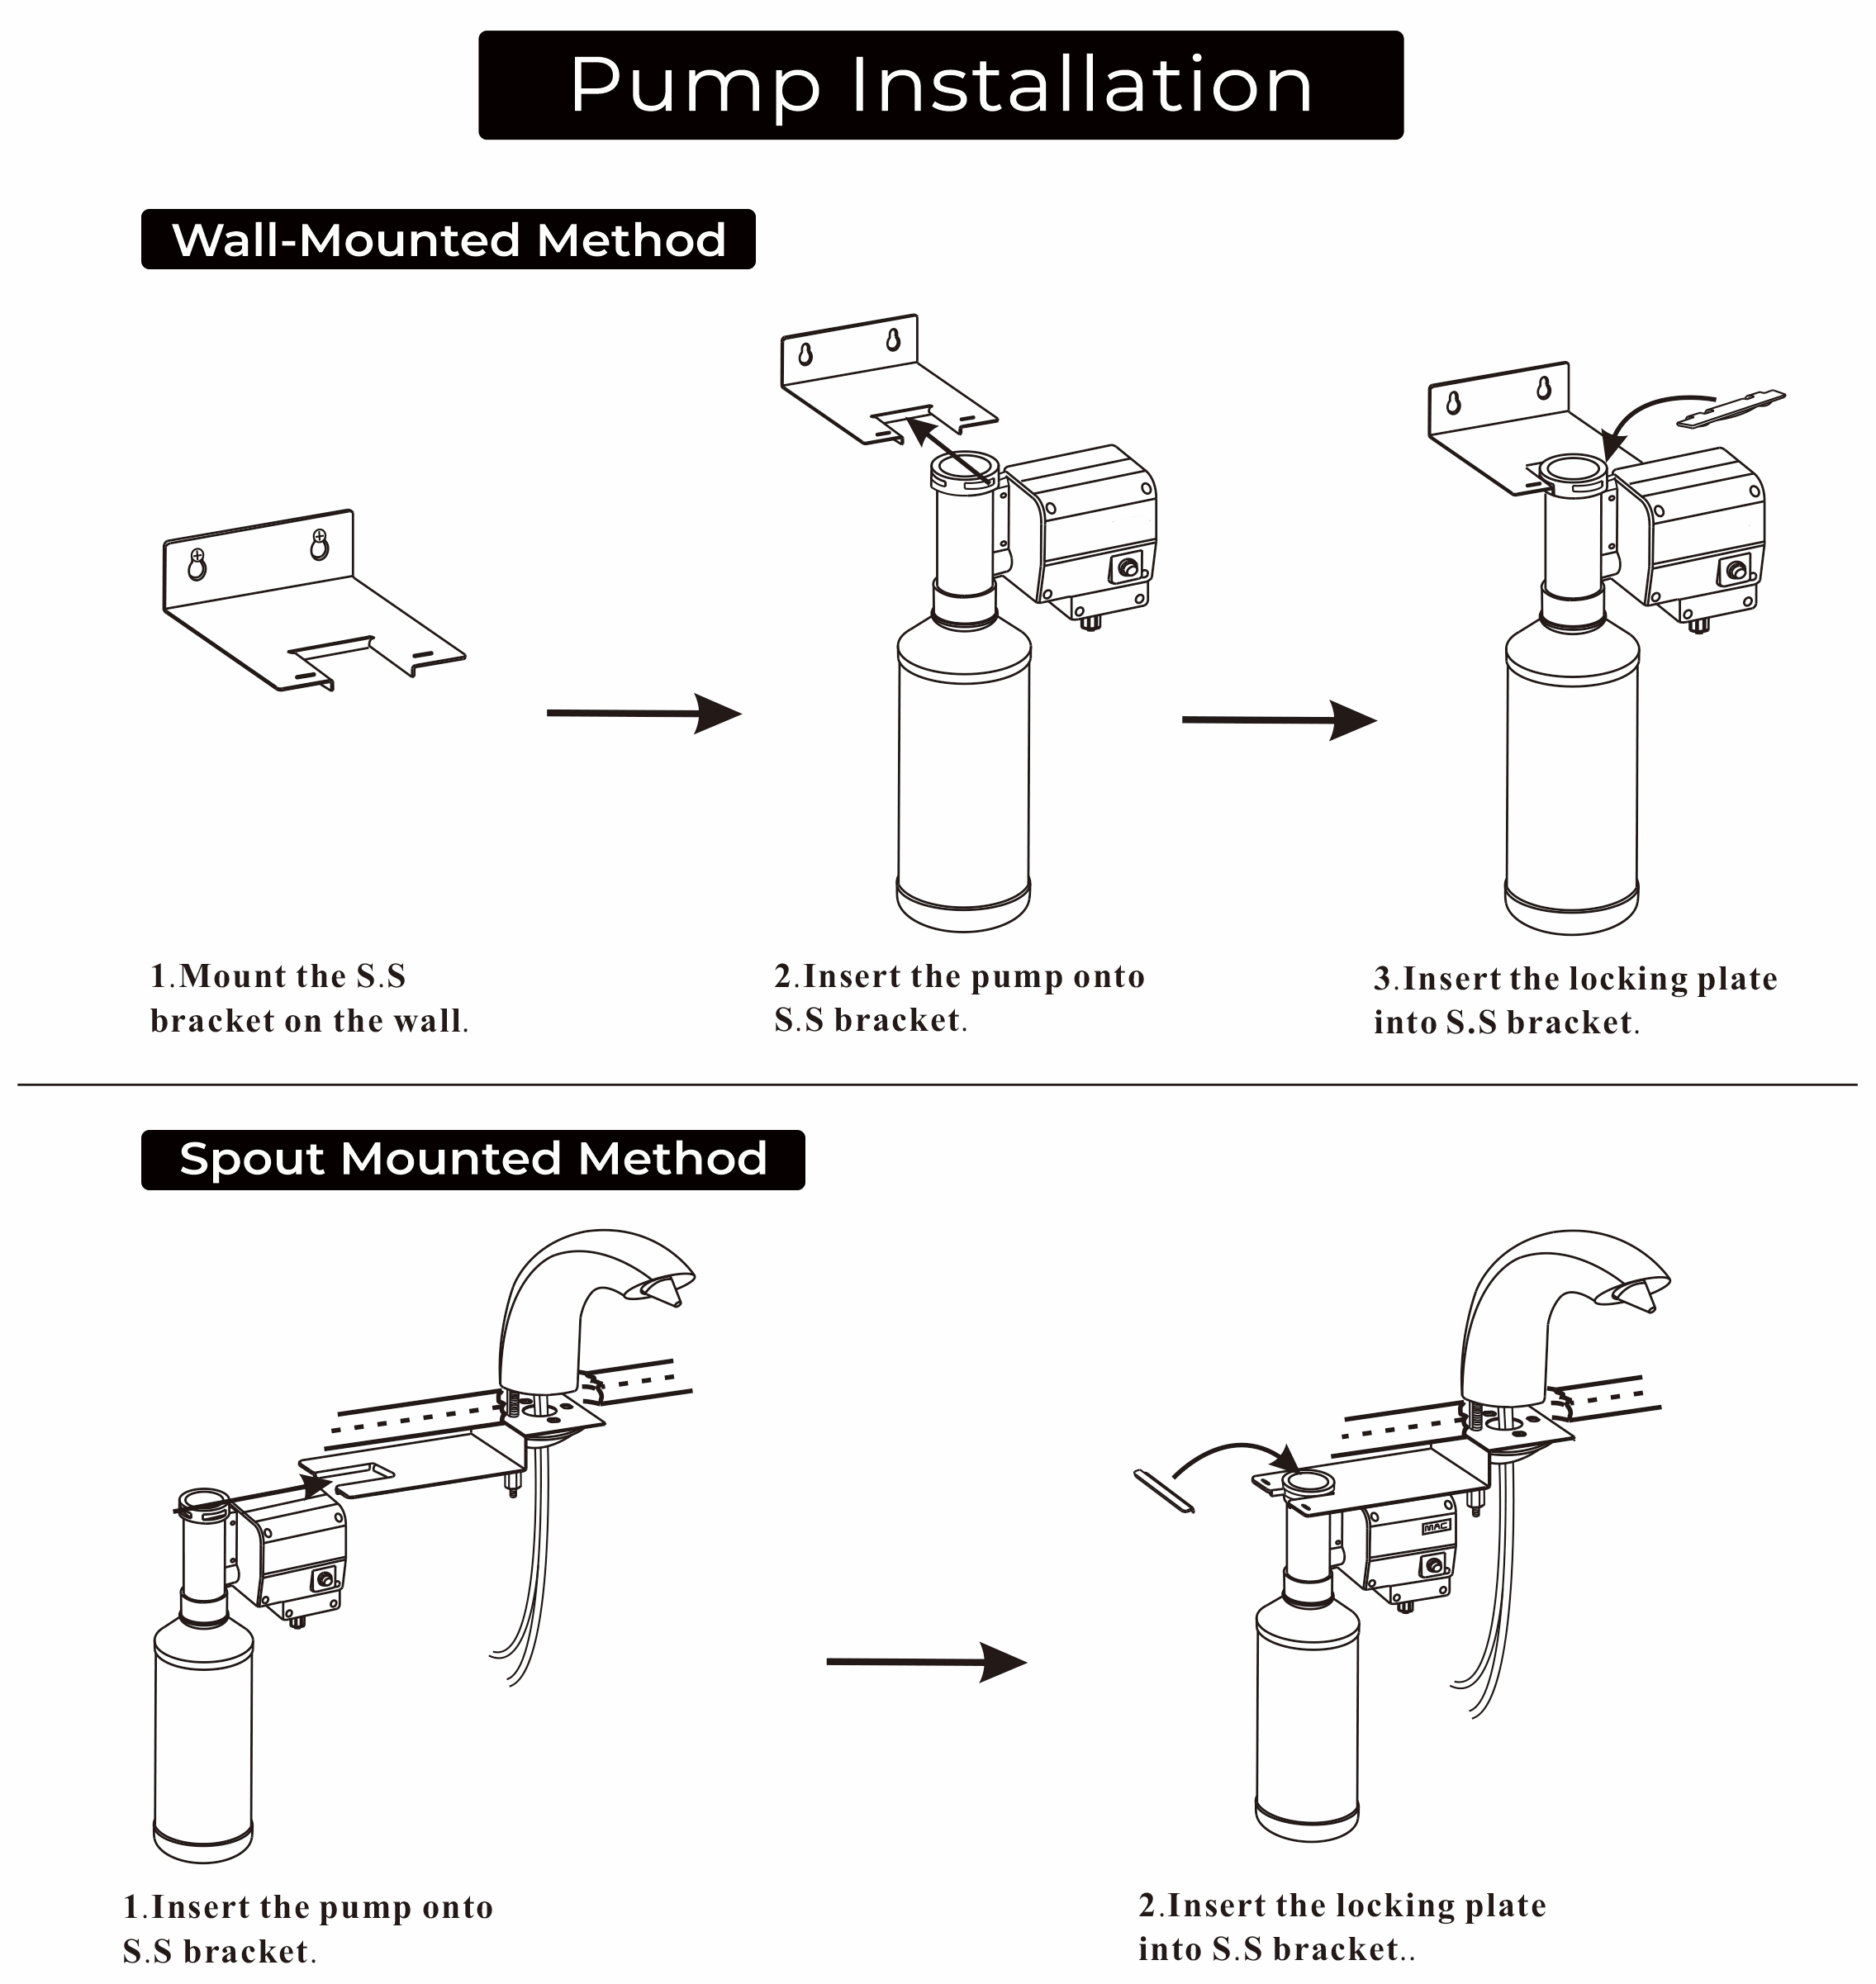
Pump Installation
Wall-Mounted Method
1. Mount the S.S bracket on the wall.
2. Insert the pump onto S.S bracket.
3. Insert the locking plate into S.S bracket.
Spout Mounted Method
1. Insert the pump onto S.S bracket.
2. Insert the locking plate into S.S bracket.
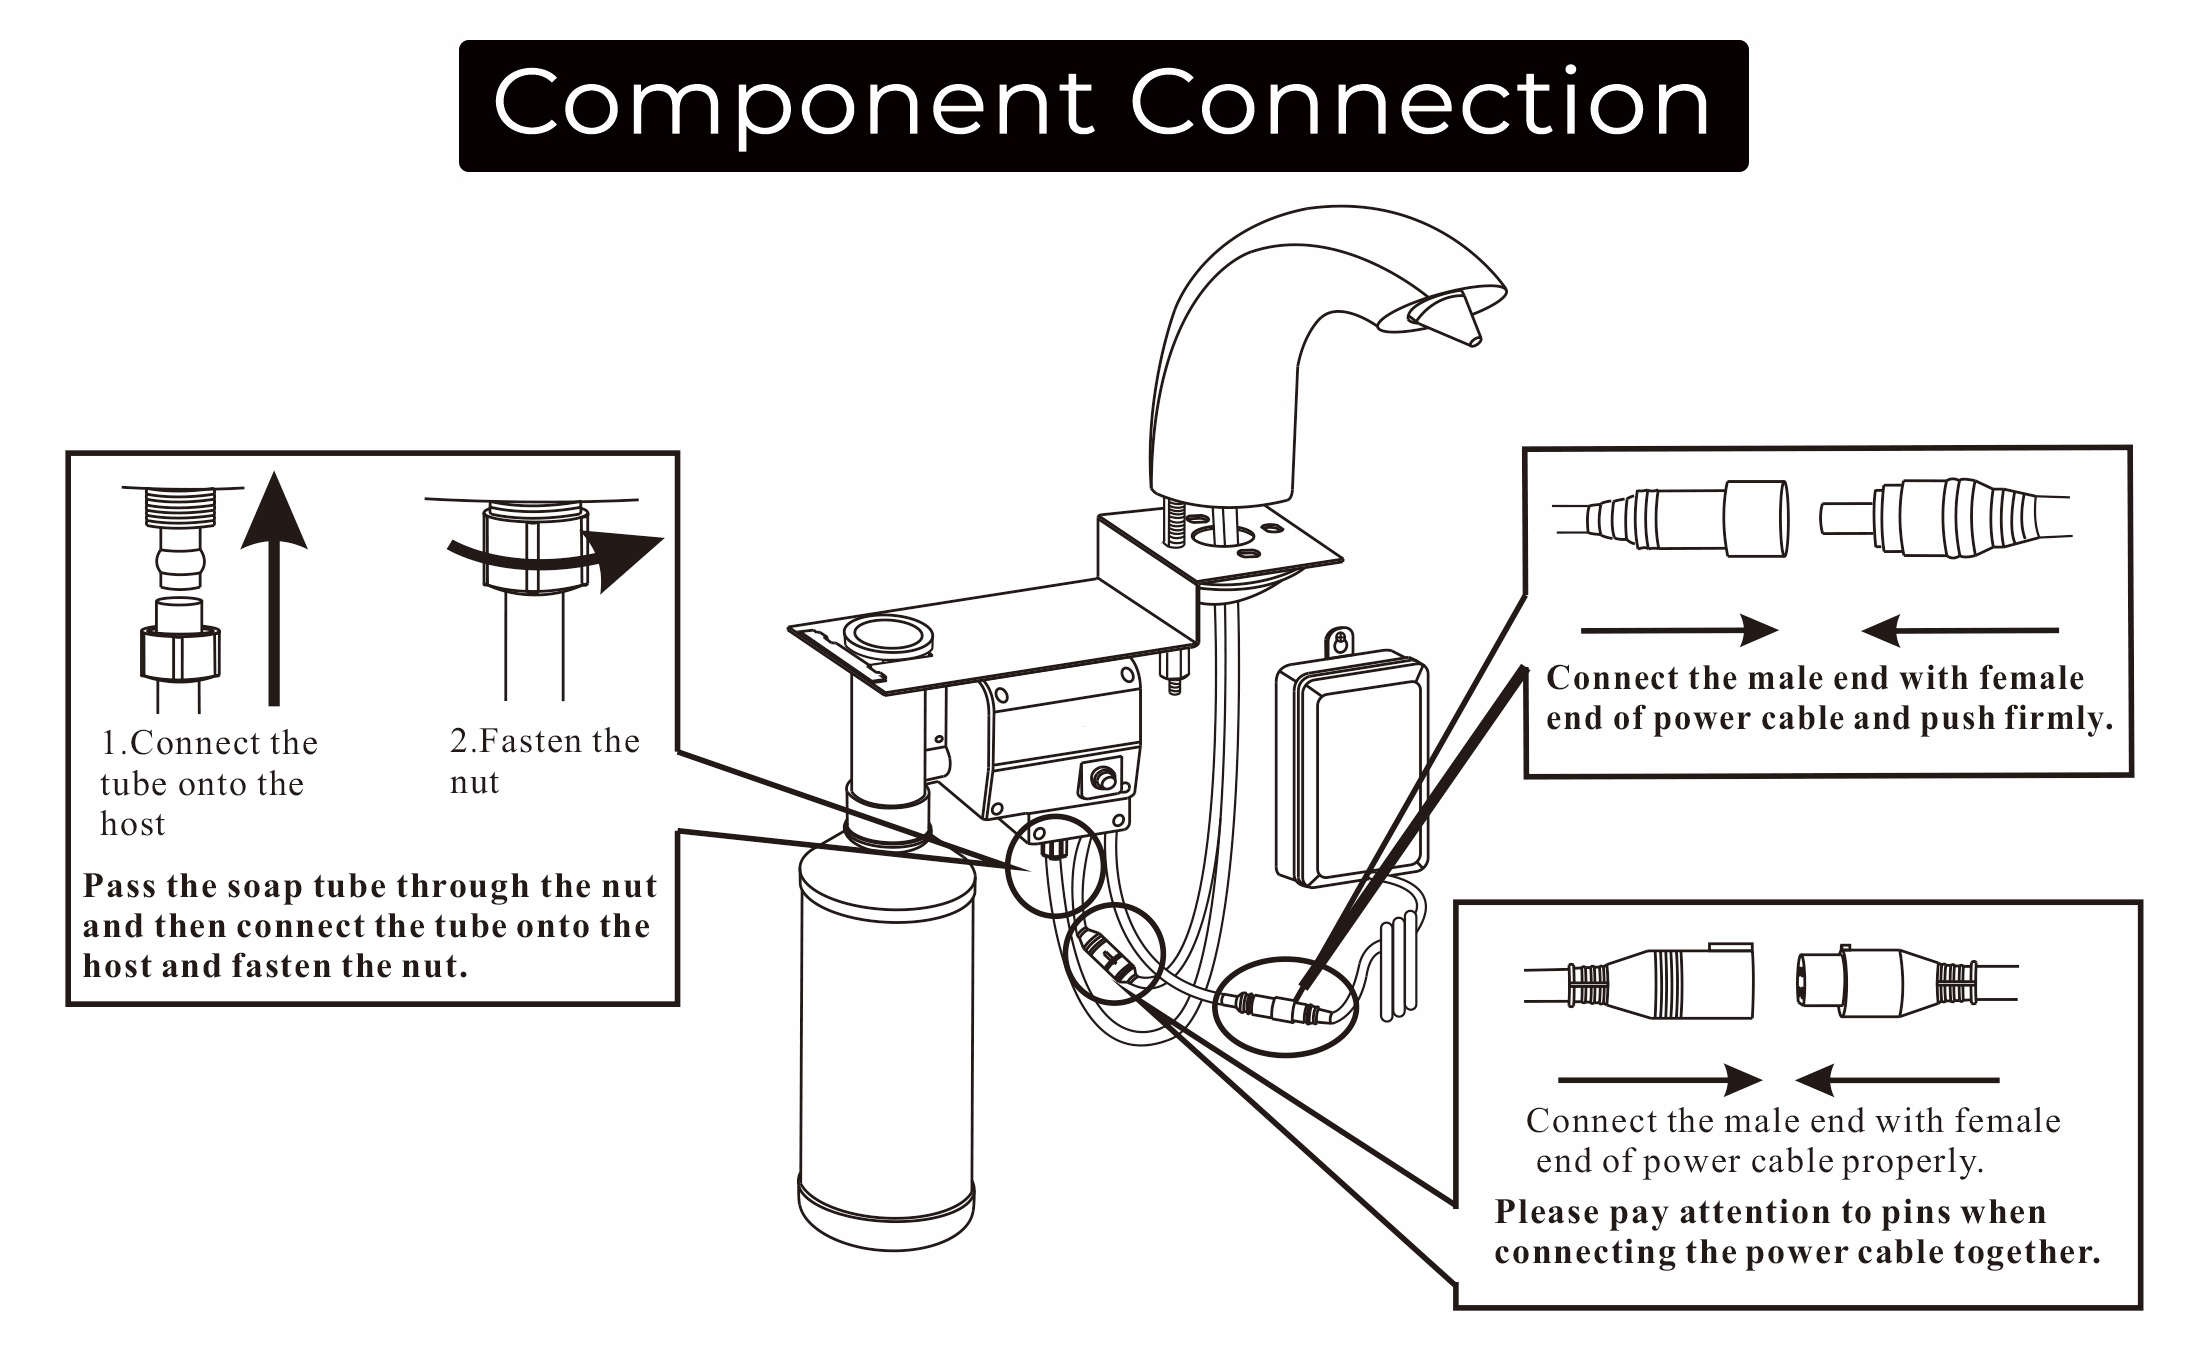
Component Connection
1. Connect the tube onto the host.
2. Fasten the nut.
Pass the soap tube through the nut and then connect the tube onto the host and fasten the nut.
Connect the male end with female end of power cable and push firmly.
Connect the male end with female end of power cable properly. Please pay attention to pins when connecting the power cable together.
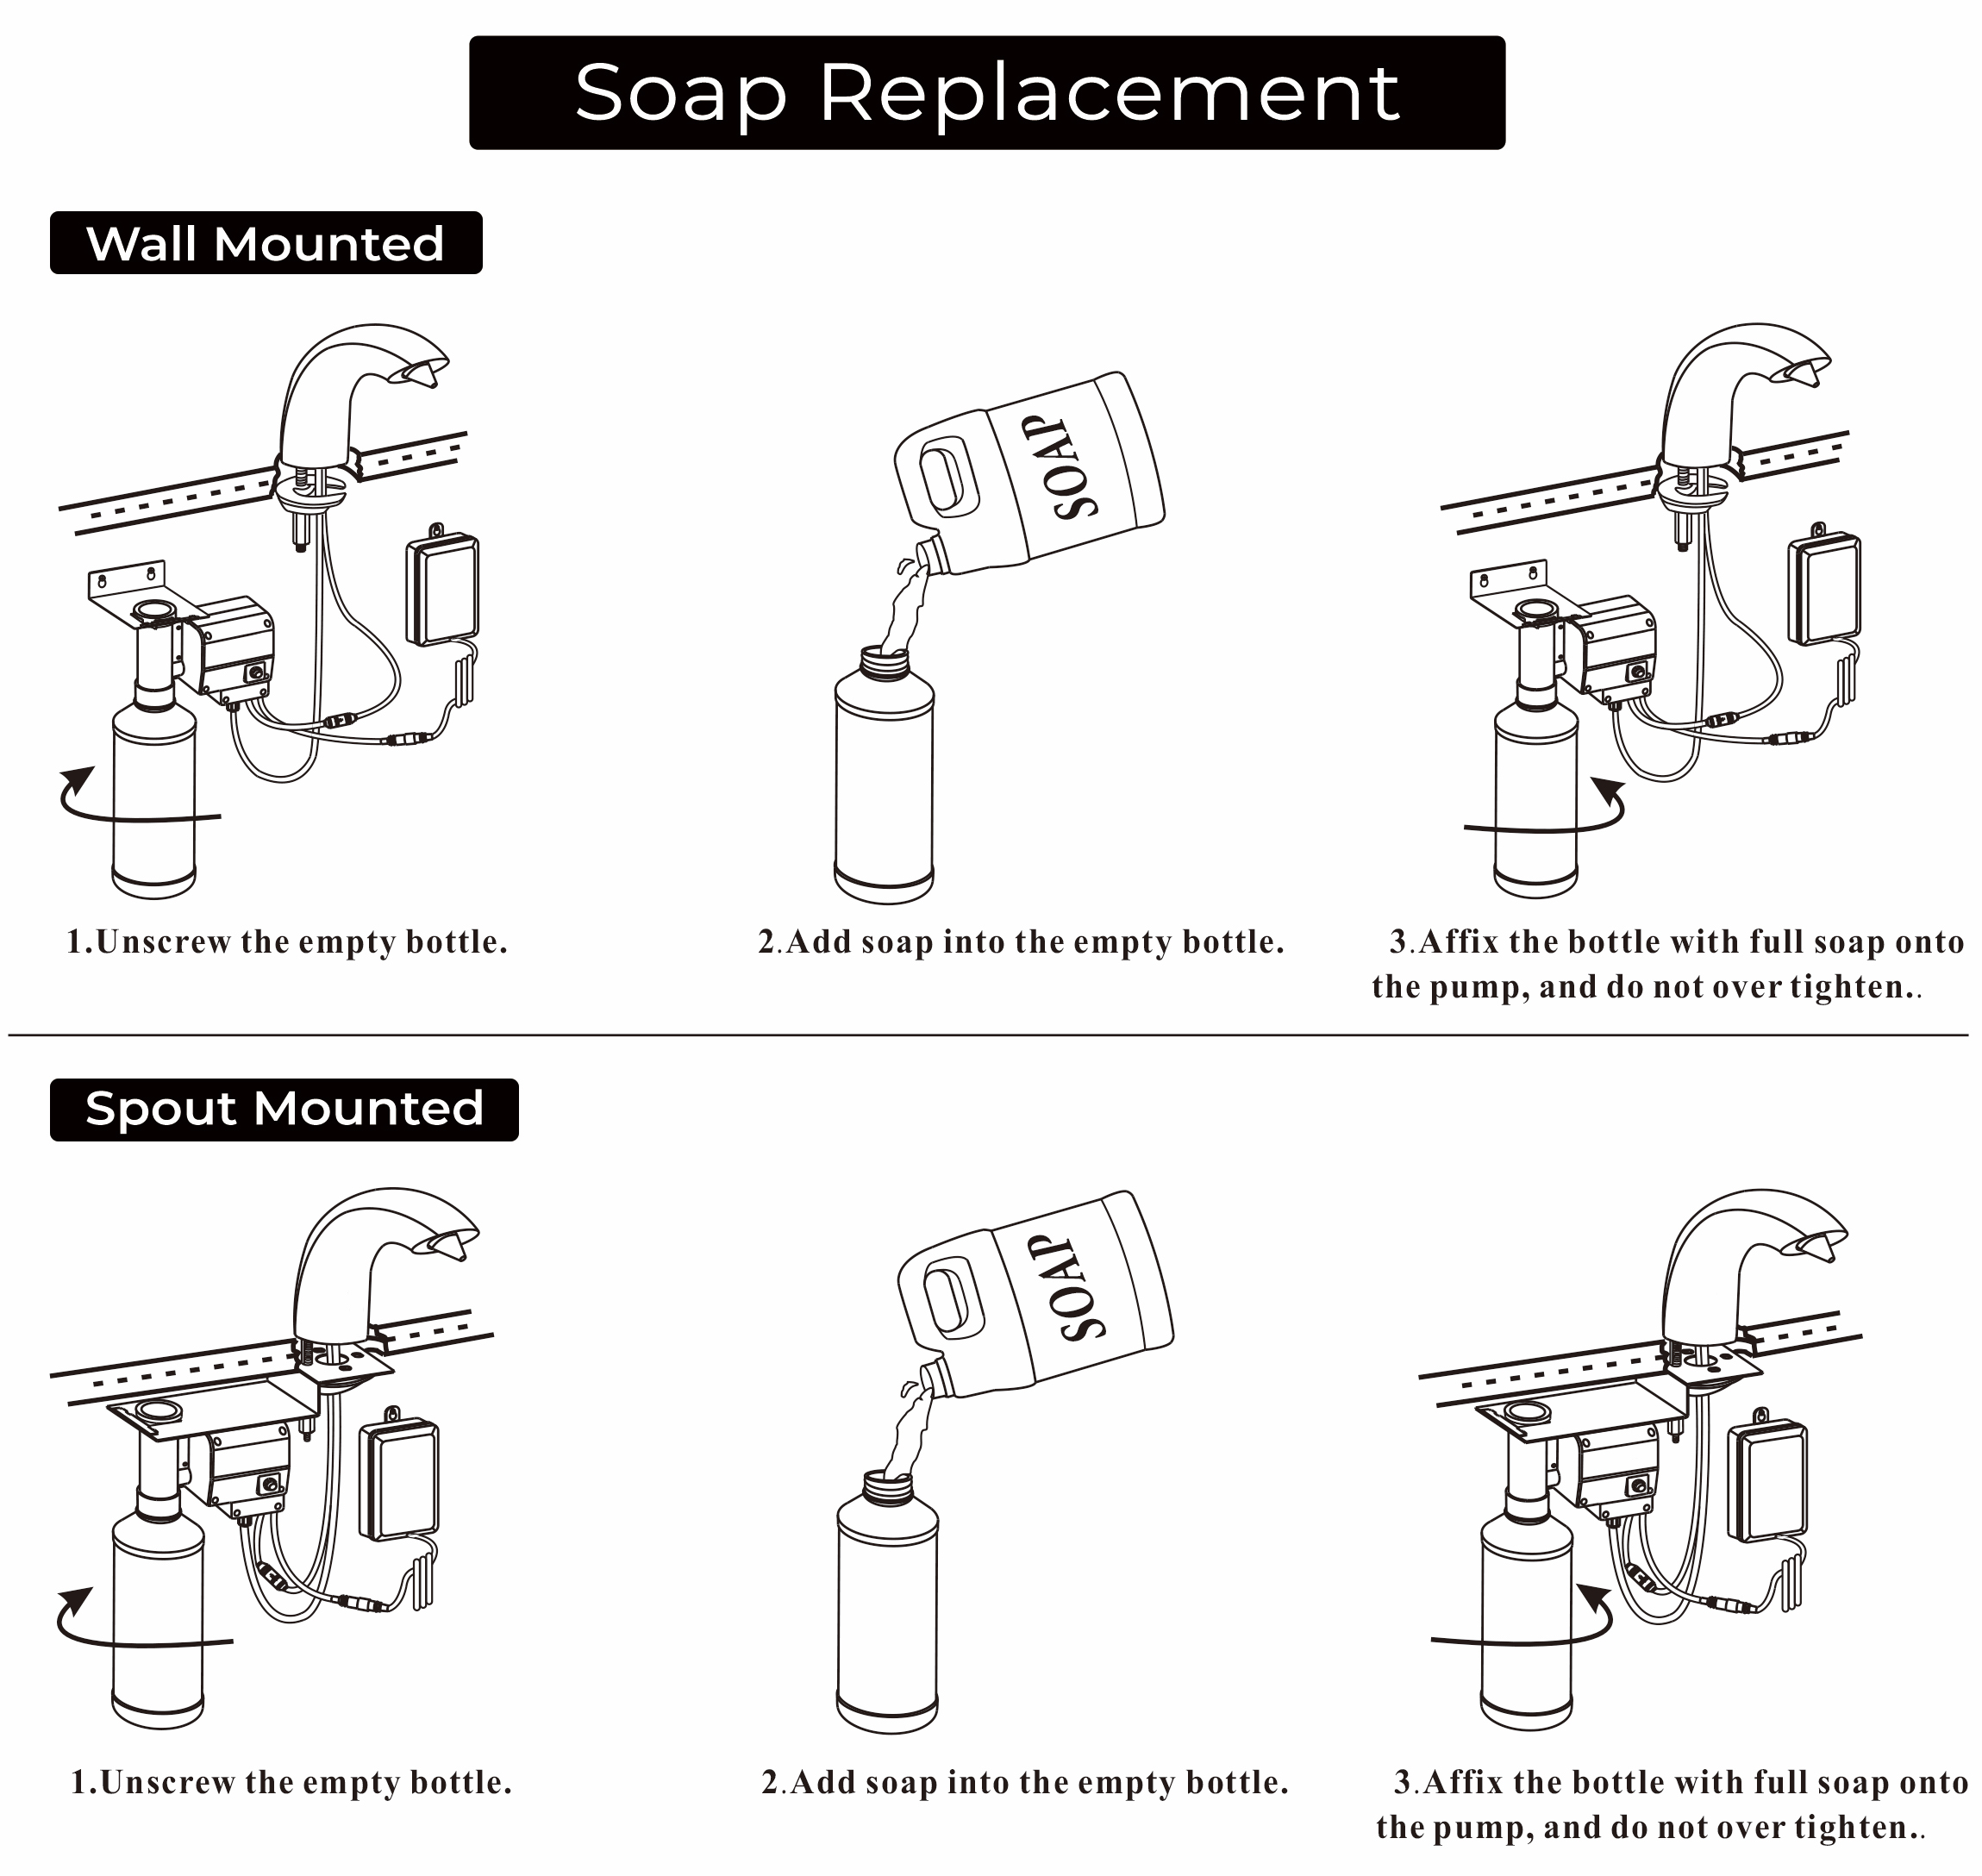
Soap Replacement
Wall Mounted
1. Unscrew the empty bottle.
2. Add soap into the empty bottle.
3. Affix the bottle with full soap onto the pump, and do not over tighten..
Spout Mounted
1. Unscrew the empty bottle.
2. Add soap into the empty bottle.
3. Affix the bottle with full soap onto the pump, and do not over tighten..
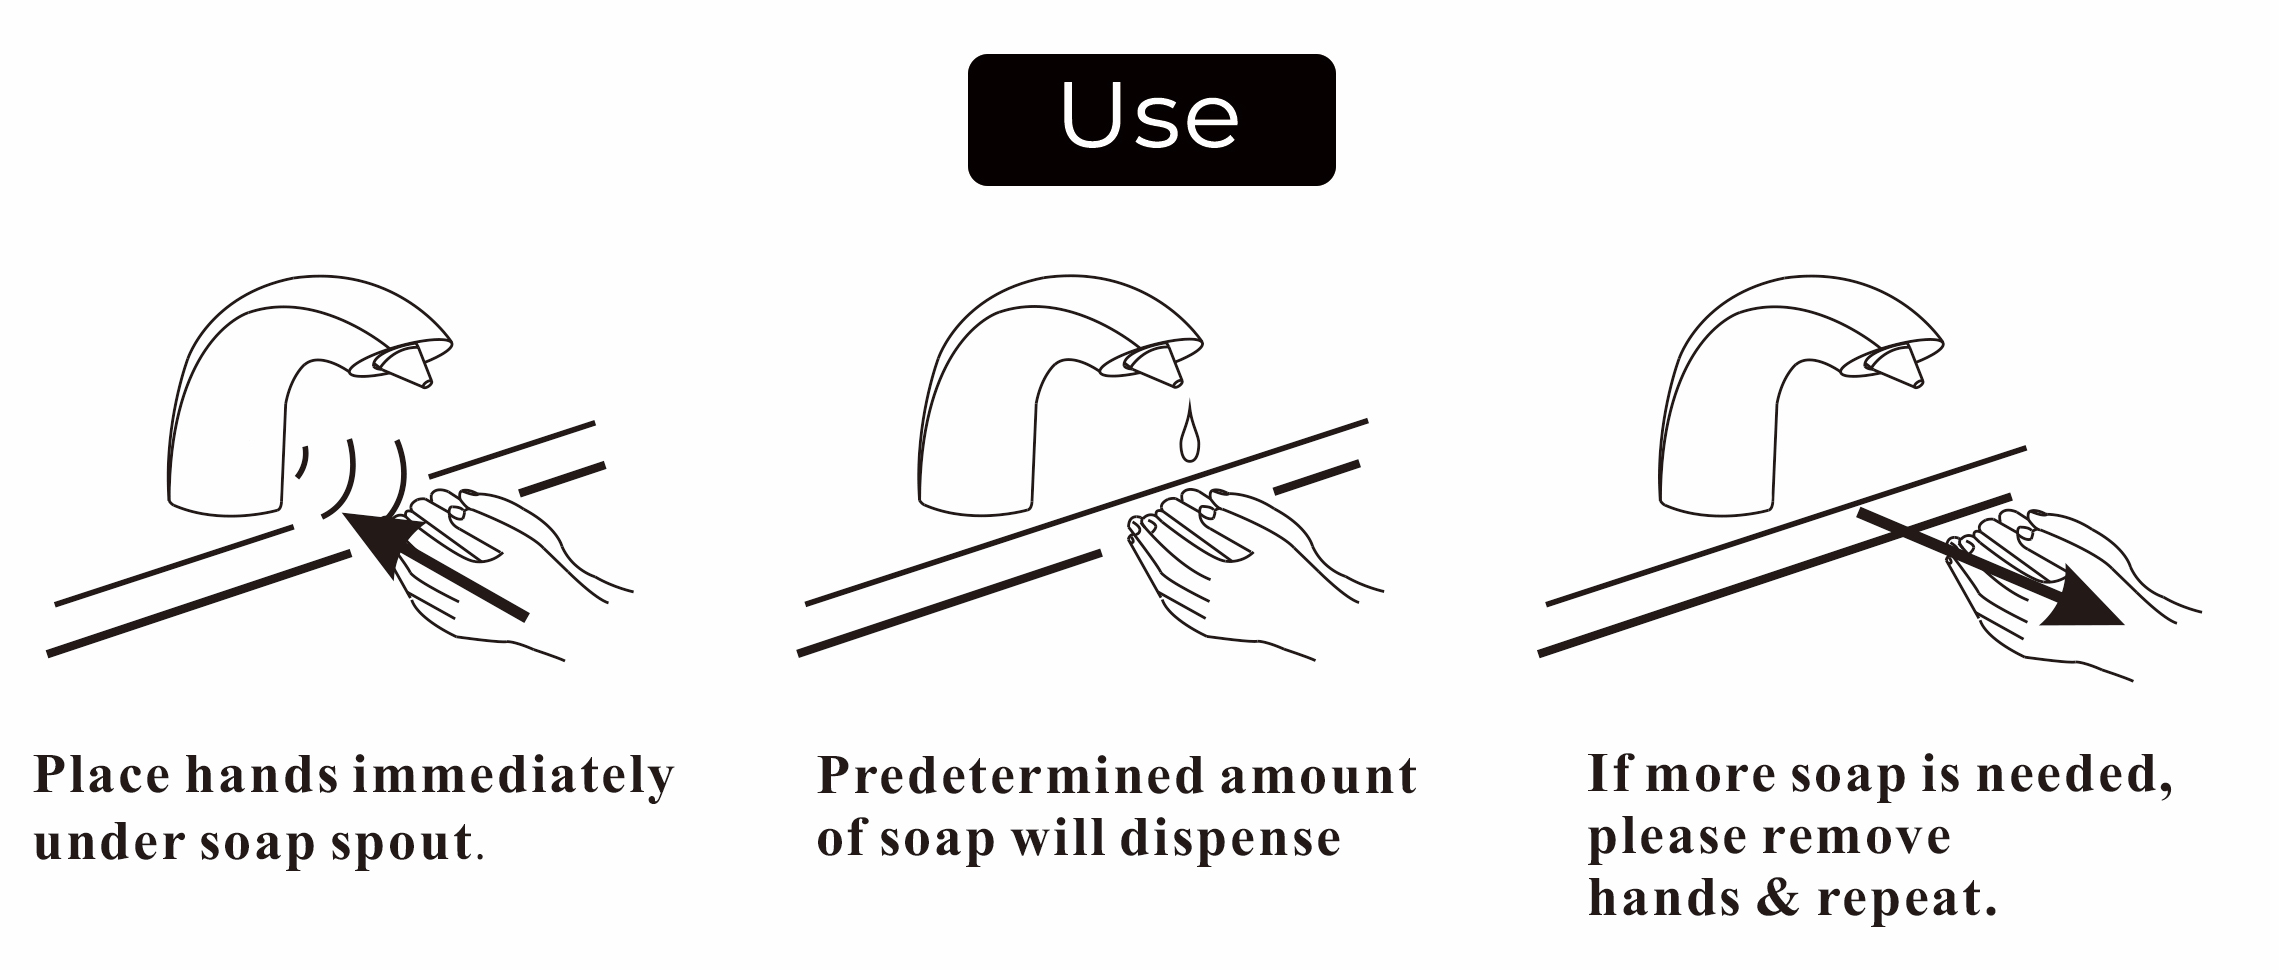
Use
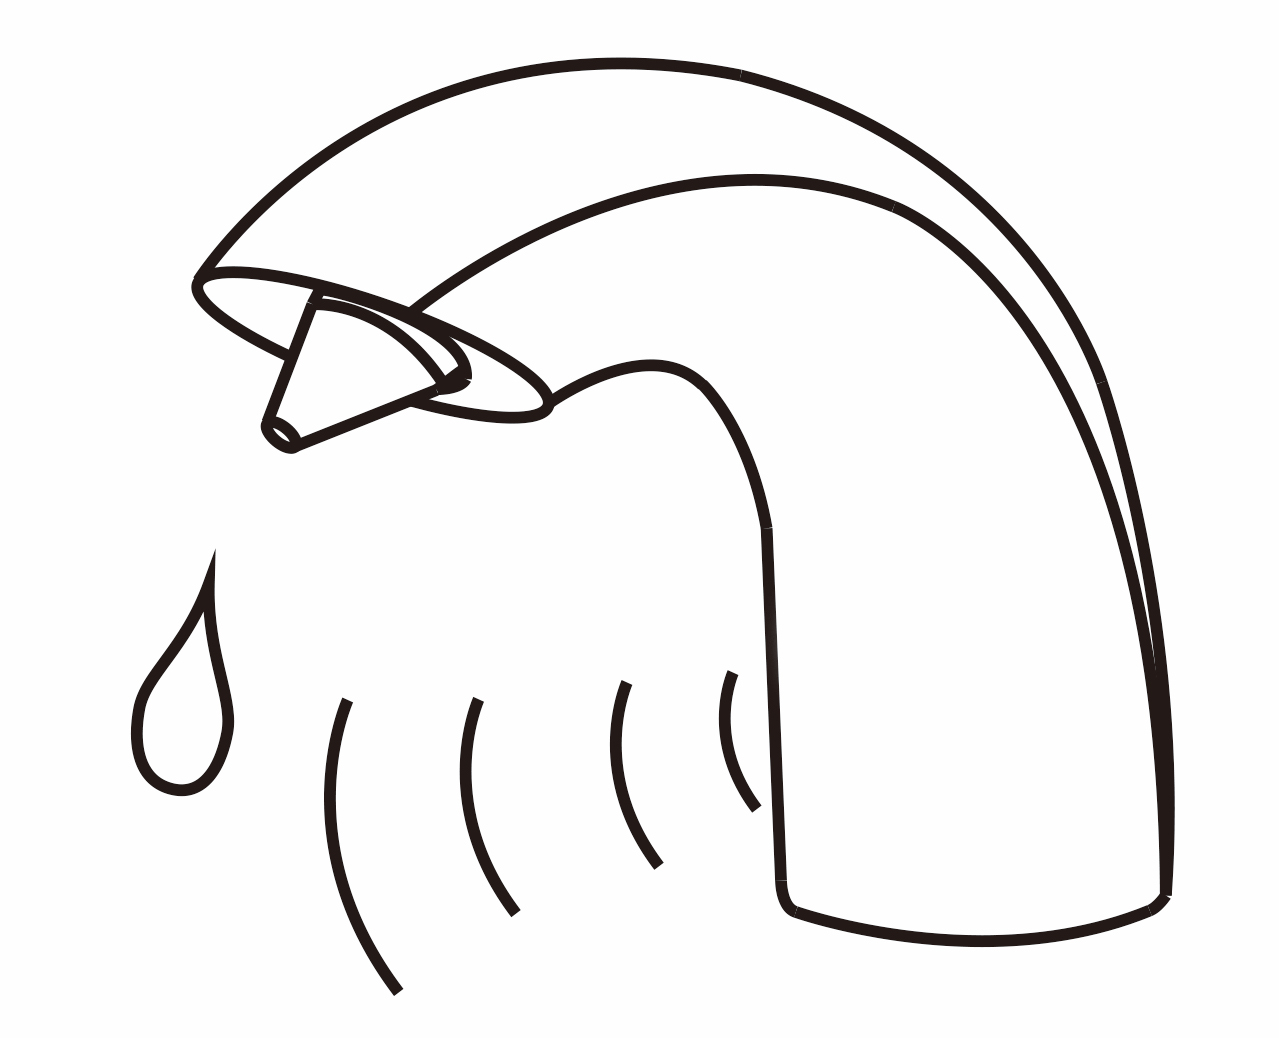
1. Place hands immediately under soap spout.
2. A predetermined amount of soap will dispense.
3. If more soap is needed, please remove hands & repeat.
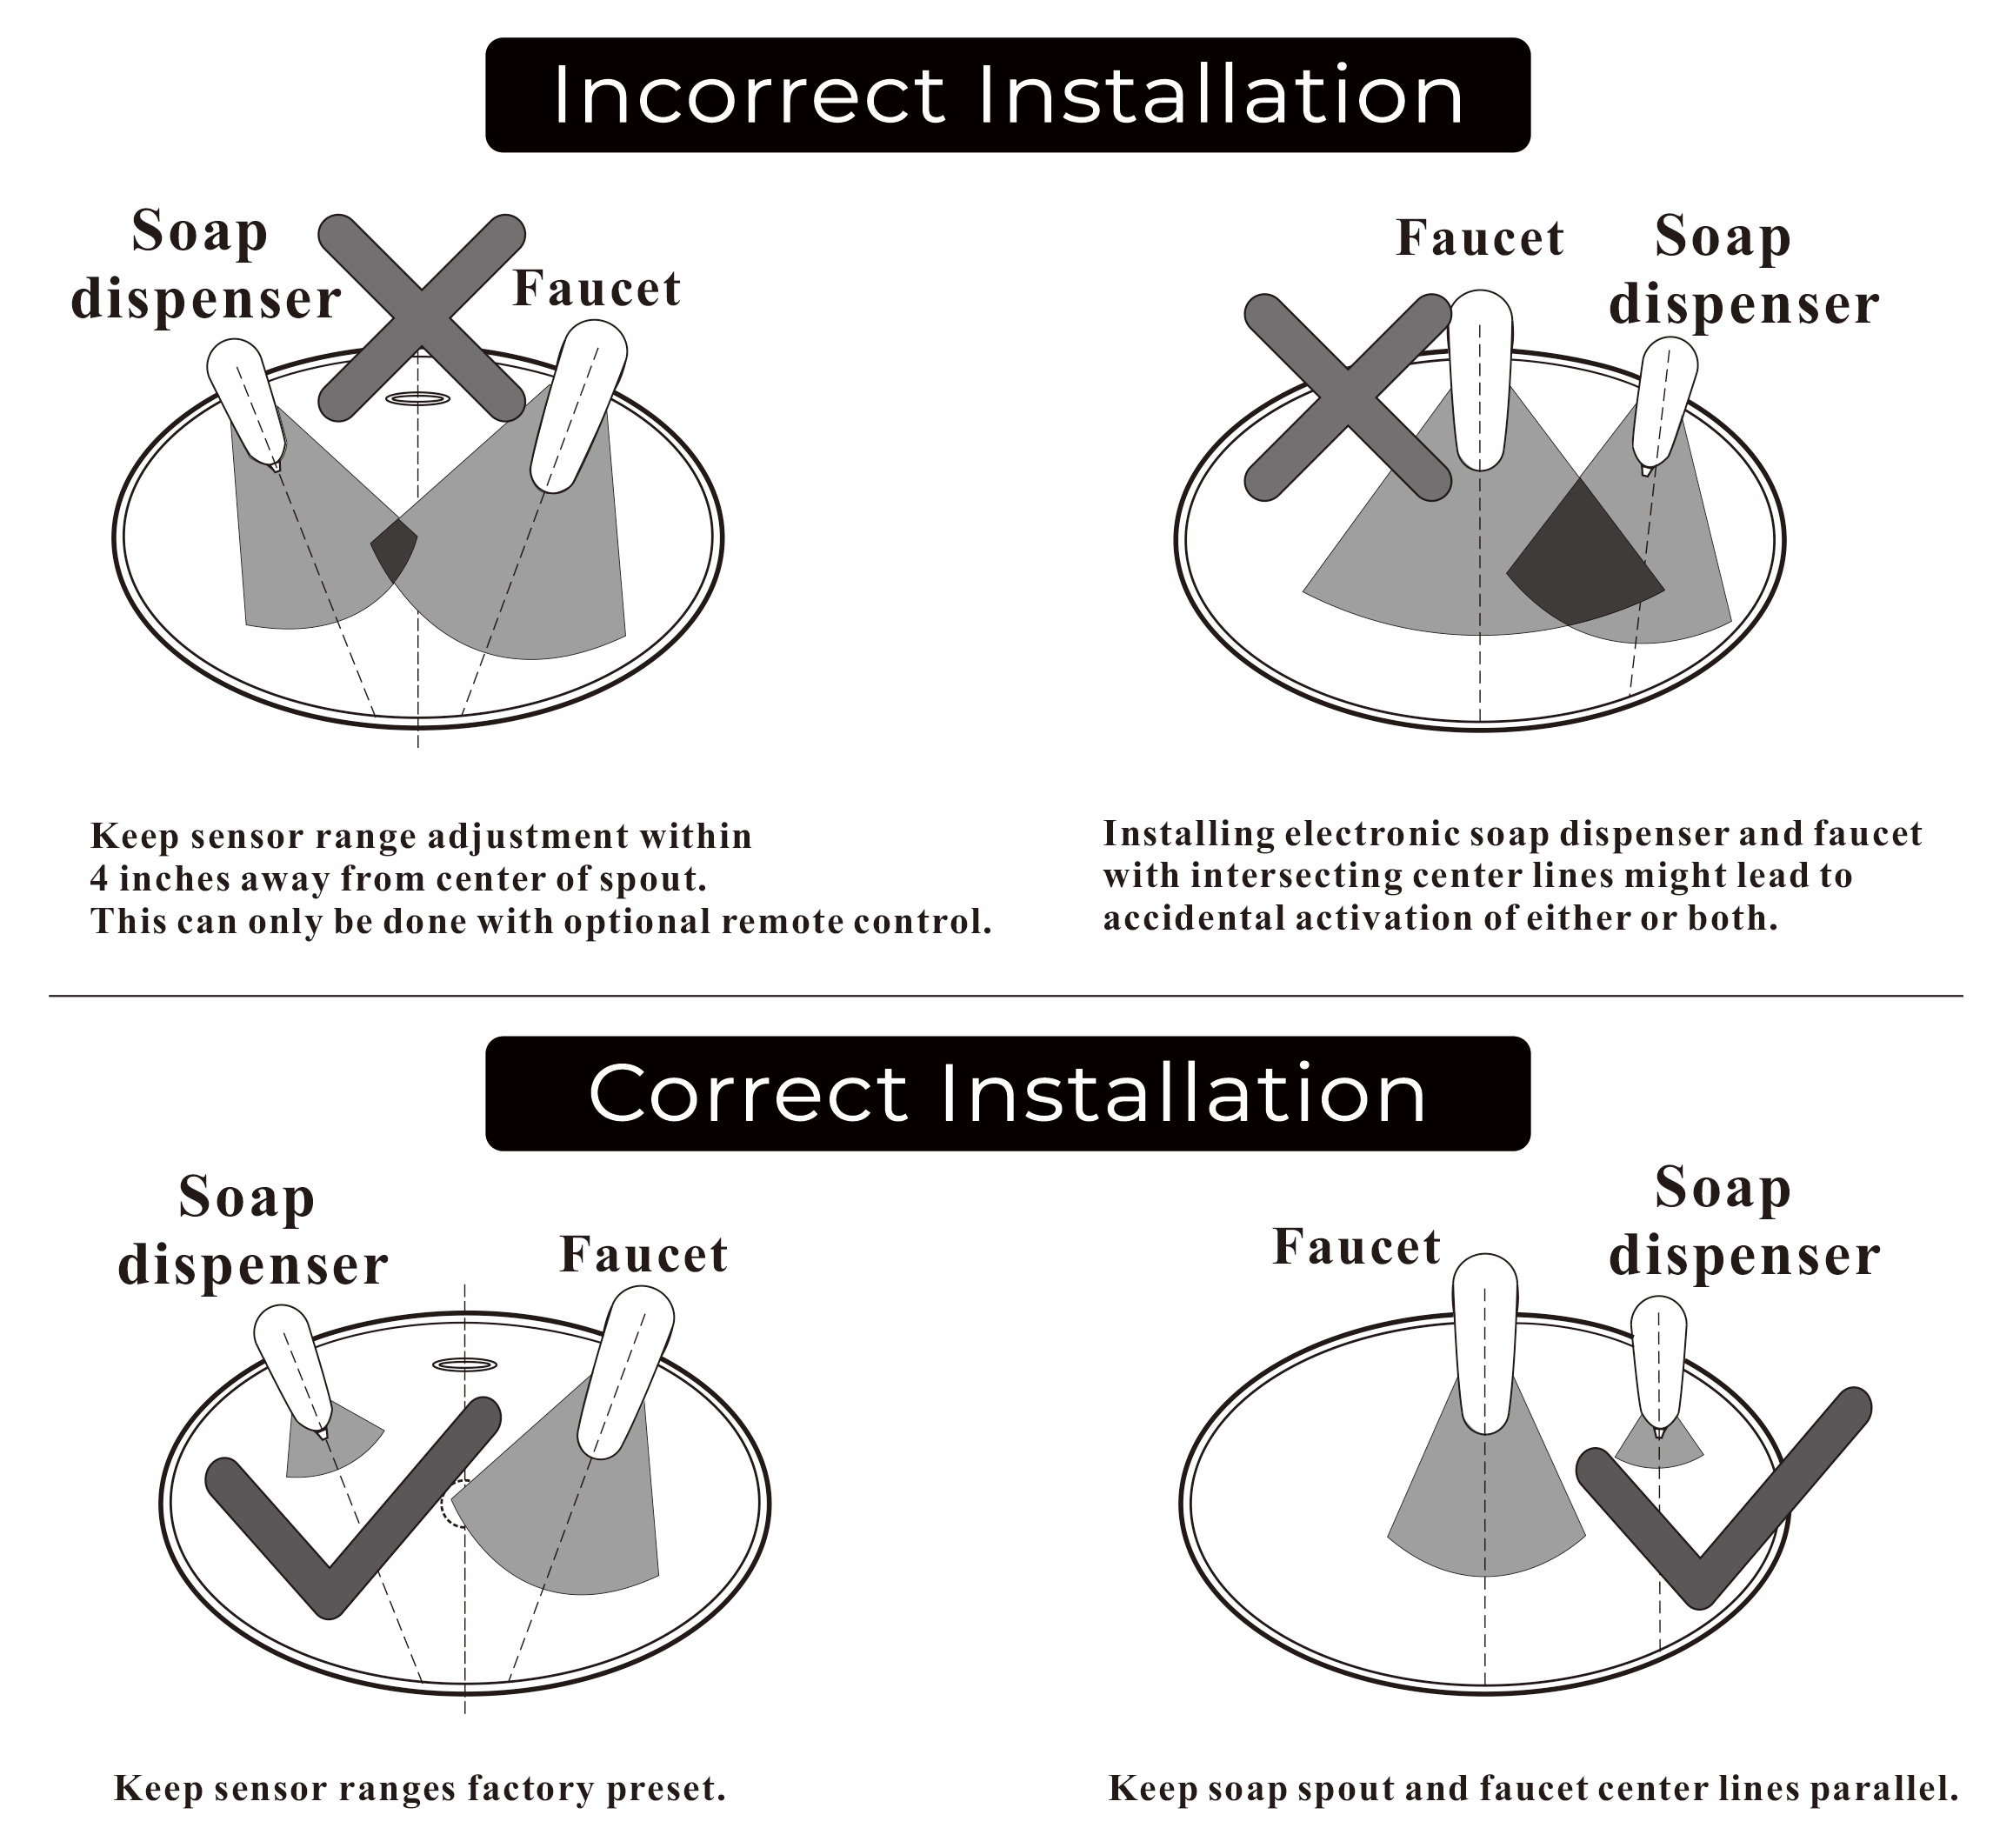
Incorrect Installation
Keep sensor range adjustment within 4 inches away from centre of spout. This can only be done with optional remote control.
Installing electronic soap dispenser and faucet with intersecting centre lines might lead to accidental activation of either or both.
Correct Installation
Keep sensor ranges factory preset.
Keep soap spout and faucet centre lines parallel.
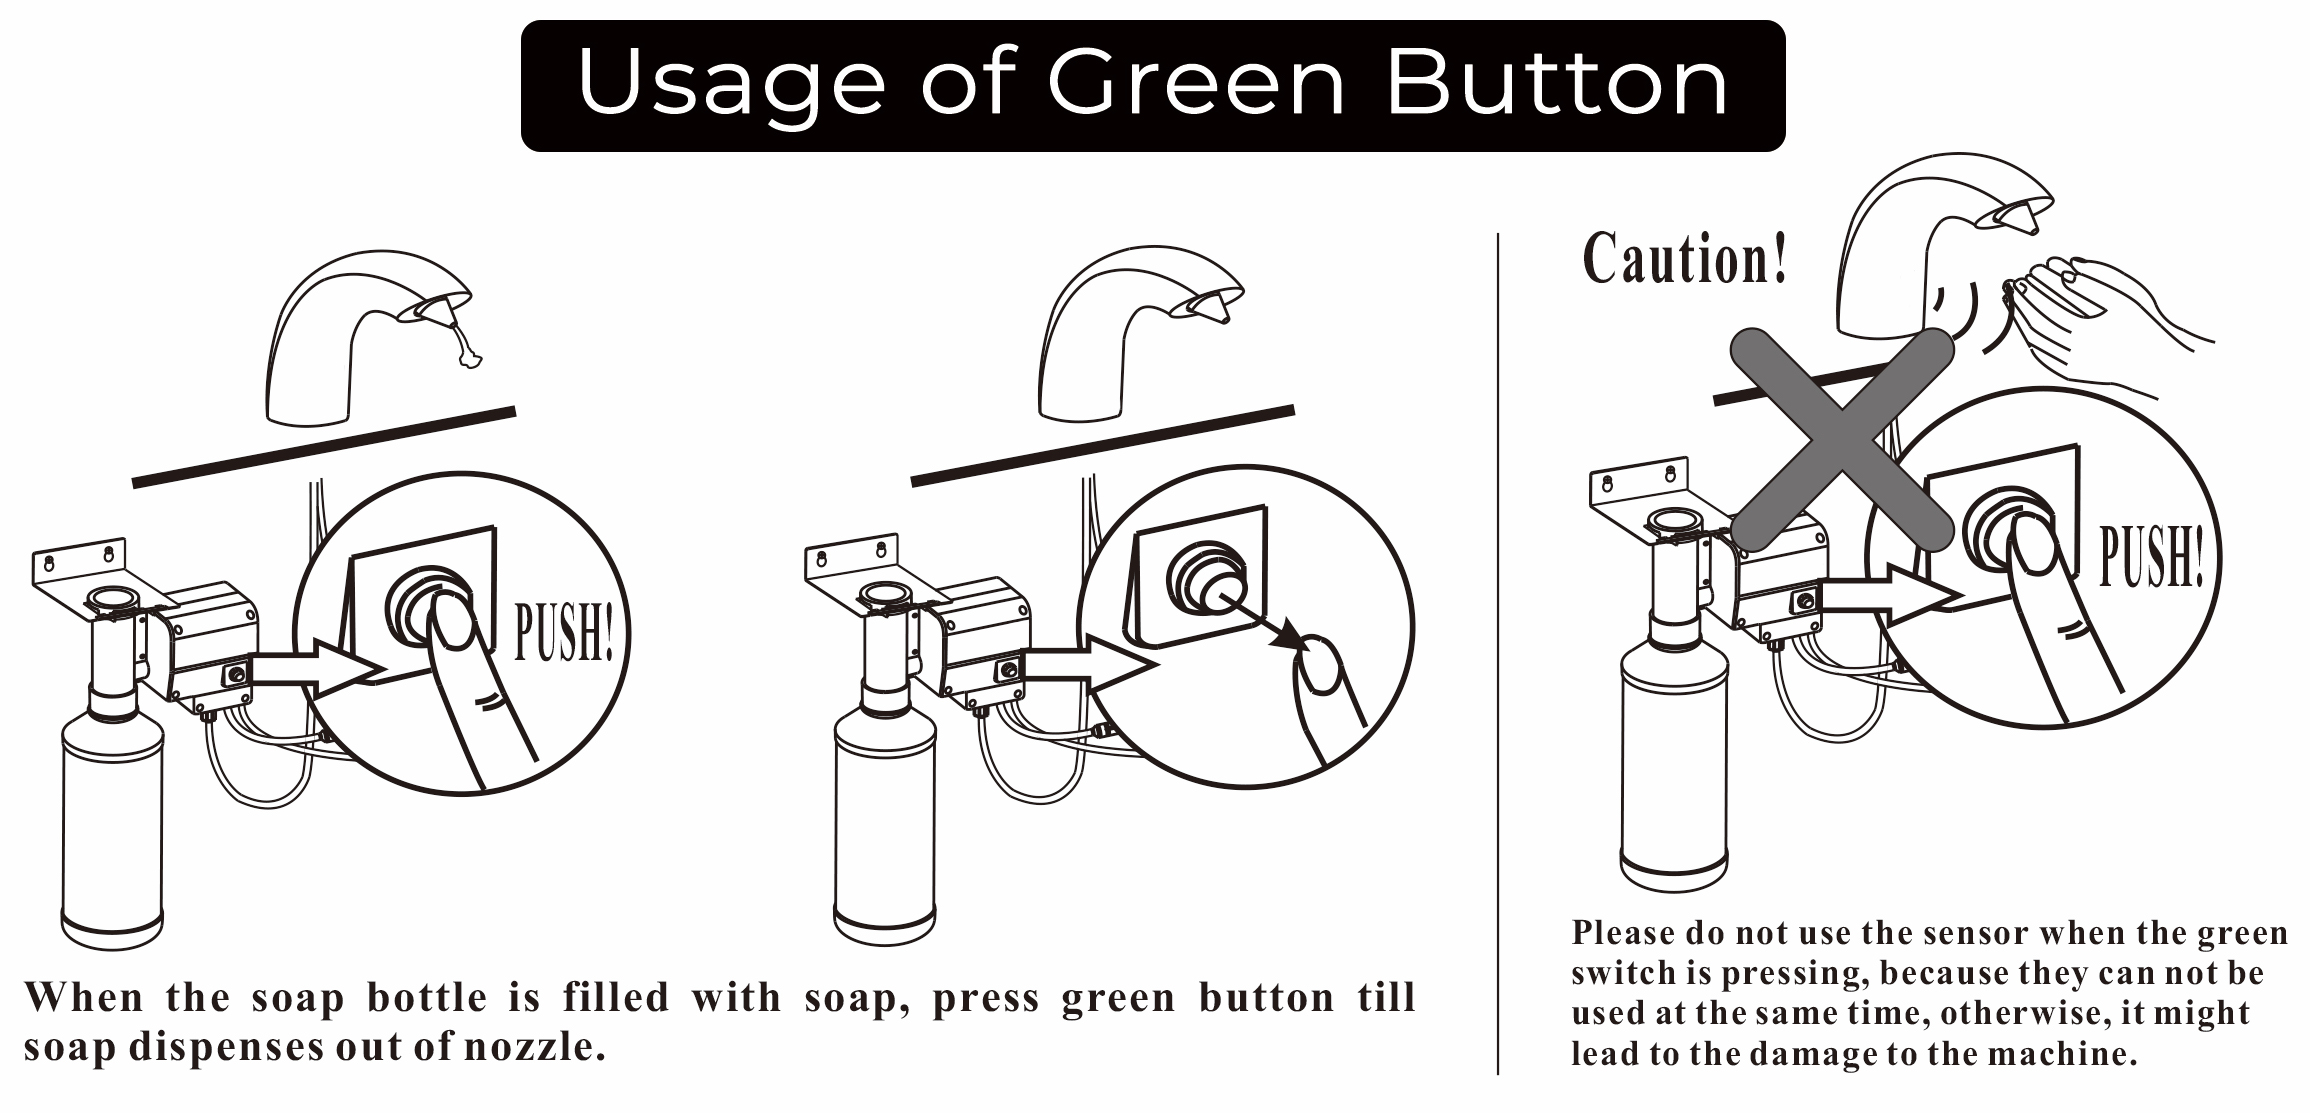
Usage of Green Button
When the soap bottle is filled with soap, press green button till soap dispenses out of nozzle.
Please do not use the sensor when the green switch is pressing, because they cannot be used at the same time, otherwise, it might lead to the damage to the machine.
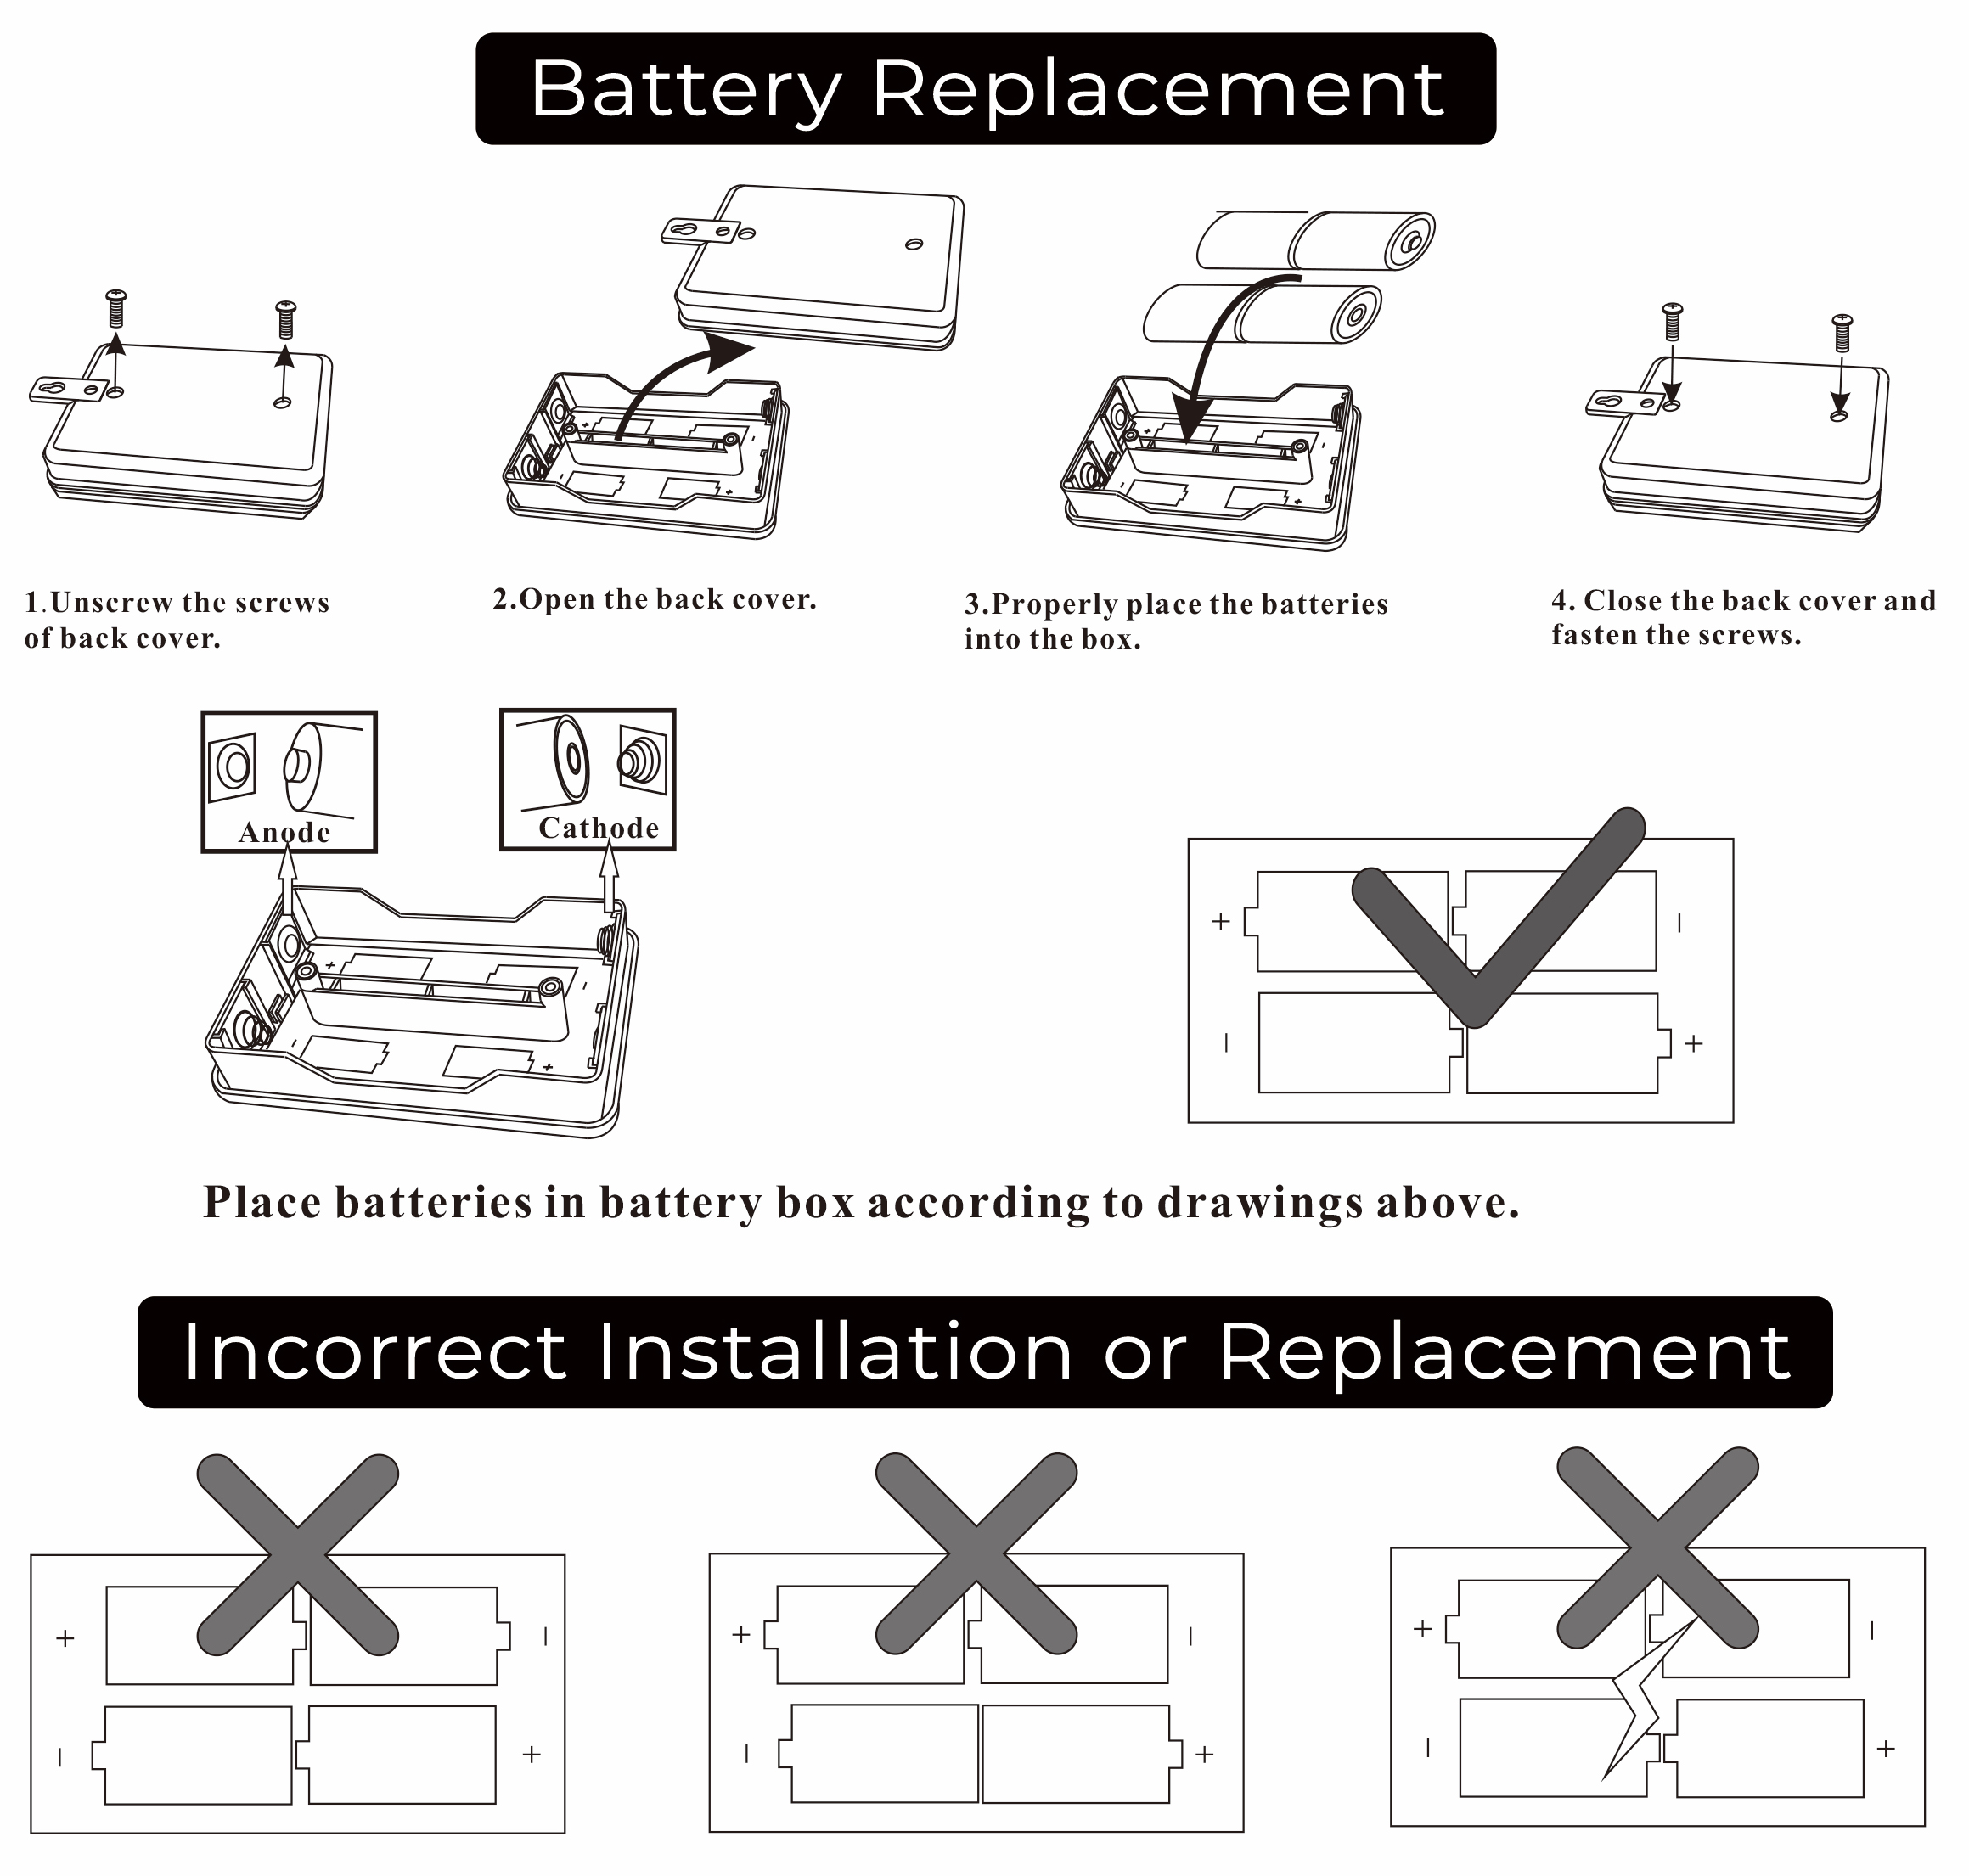
Battery Replacement
1. Unscrew the screws of back cover.
2. Open the back cover.
3. Properly place the batteries into the box.
4. Close the back cover and fasten the screws.
Place batteries in the battery box according to drawings above.
|